

| Intersoft ClientUI 8 > ClientUI Controls > Control Library > Advanced Content Controls Overview > UXCallOut > Walkthrough: Use UXCallout to Display a Rich Tooltip |
This walkthrough shows you how to display a rich tooltip by using UXCallOut control.
In this walkthrough, you perform the following tasks:
You need the following components to complete this walkthrough:
The first step is to create a new ClientUI Application project using Intersoft ClientUI Application project template in Visual Studio.
This section shows you how to create UXCallOut to display rich tooltip.
| XAML |
Copy Code
|
|---|---|
<Grid x:Name="LayoutRoot" Width="220" Height="120"> <Intersoft:DockPanel FillChildMode="Custom"> <Intersoft:GlassLabel Intersoft:DockPanel.Dock="Top" Content="Register" /> </Intersoft:DockPanel></Grid> |
|
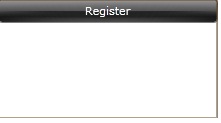
| XAML |
Copy Code
|
|---|---|
<Intersoft:DockPanel... > ... <StackPanel Intersoft:DockPanel.IsFillElement="True" HorizontalAlignment="Center"> <Intersoft:FieldLabel Header="Username" HeaderWidth="70"> <Intersoft:UXTextBox Width="100" /> </Intersoft:FieldLabel> </StackPanel></Intersoft:DockPanel> |
|
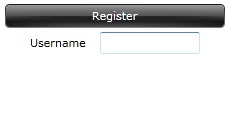
| XAML |
Copy Code
|
|---|---|
<StackPanel Intersoft:DockPanel.IsFillElement="True" HorizontalAlignment="Center"> ... <Intersoft:FieldLabel Header="Password" HeaderWidth="70"> <StackPanel Orientation="Horizontal"> <Intersoft:UXTextBox Width="100" /> </StackPanel> </Intersoft:FieldLabel></StackPanel> |
|
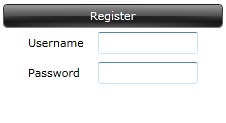
| XAML |
Copy Code
|
|---|---|
<Intersoft:FieldLabel... > <StackPanel...> ... <Intersoft:UXCallOut PreferredPosition="Right" MouseEnterAction="ShowPopup" MouseLeaveAction="HidePopup"> <Intersoft:UXCallOut.Header> <Image Source="/WalkthroughUseUXCalloutToAchieveRichTooltip;component/Images/Information.png" Margin="5 0 0 0" /> </Intersoft:UXCallOut.Header> <TextBlock Text="Password must be insert" /> </Intersoft:UXCallOut> </StackPanel></Intersoft:FieldLabel> |
|
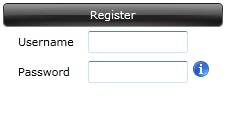
| Property | Value |
|---|---|
| Content | Register |
| Width | 100 |
| HorizontalAlignment | Right |
| Margin | 0 0 25 0 |
| XAML |
Copy Code
|
|---|---|
<Intersoft:UXButton Content="Register" Width="100" HorizontalAlignment="Right" Margin="0 0 25 0" /> |
|
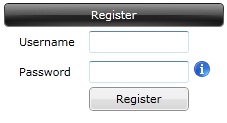
After the application is running in the browser, you can try to move your cursor towards information image. When the mouse enters the boundary of the image, the tooltip will be shown. Likewise, the tooltip will be hidden when the mouse leaves the images. See the following figure for the result.

In this walkthrough, you have learned how to create ClientUI project using project template. You also learned how to create UXCallOut to display a rich tooltip.