
| Intersoft ClientUI 8 > ClientUI Fundamentals > Navigation Overview > Navigation Walkthroughs > Walkthrough: Create Simple Website Navigation Using Frame, Navigation Button and Hyperlink |
This walkthrough shows how to create simple website navigation by adding new page, new button and how to link the new button to the new page.
In this walkthrough, you perform the following tasks:
You need the following components to complete this walkthrough:
The first step is to create a new ClientUI Basic Navigation Application project using Intersoft ClientUI Basic Navigation Application project template in Visual Studio.
Next, you will add a new page to your project.
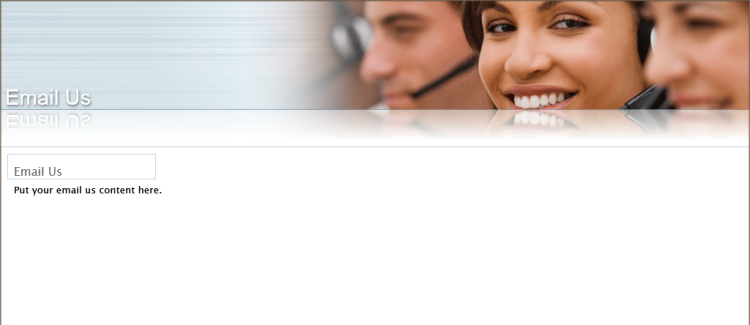
This section shows how to create new page using Intersoft UXPage.
 |
For more information on how to add a new item in Visual Studio, see Walkthrough: Add New Item such as Page, Dialog Box and Window in VS 2010 |
| XAML |
Copy Code
|
|---|---|
<Grid x:Name="LayoutRoot"> <Grid.RowDefinitions> <RowDefinition Height="200"></RowDefinition> <RowDefinition></RowDefinition> </Grid.RowDefinitions> <Intersoft:ContentReflector Grid.Row="0" x:Name="HeaderReflector" HorizontalAlignment="Left" ContentHeight="150" Margin="0,0,0,5.5" HorizontalContentAlignment="Left" ContentWidth="1024"> <Intersoft:ContentReflector.ReflectionBrush> <LinearGradientBrush EndPoint="0.5,1" StartPoint="0.5,0"> <GradientStop Color="#80000000" Offset="1"/> <GradientStop Color="#00000000" Offset="0.721"/> </LinearGradientBrush> </Intersoft:ContentReflector.ReflectionBrush> <Grid> <Image Source="../Assets/Images/Services.png" Stretch="Fill"/> <TextBlock Text="Email Us" VerticalAlignment="Bottom" HorizontalAlignment="Left" Margin="8,0,0,0" FontSize="29.333" Foreground="White" FontFamily="Arial"> <TextBlock.Effect> <DropShadowEffect ShadowDepth="2" Opacity="0.5"/> </TextBlock.Effect> </TextBlock> </Grid> </Intersoft:ContentReflector> <Intersoft:DockPanel Grid.Row="1"> <Intersoft:GroupBox Header="Email Us" VerticalAlignment="Top" Intersoft:DockPanel.IsFillElement="True" Margin="10" Style="{StaticResource MainContentStyle}"> <Grid> <TextBlock TextWrapping="Wrap" VerticalAlignment="Top" Text="Put your email us content here."/> </Grid> </Intersoft:GroupBox> </Intersoft:DockPanel> </Grid> |
|

Next, you will create the UXNavigationButton that navigate to this page.
This section shows how to create a new navigation button using UXNavigationButton and set the NavigationUri to EmailUs.xaml page you just created in the previous section.
| Property | Value |
|---|---|
| Name | EmailLink |
| Content | Email Us |
| NavigateUri | /EmailUs |
| Style | {StaticResource NavigationButtonStyle} |
| XAML |
Copy Code
|
|---|---|
<Grid x:Name="Header"> <local:Branding HorizontalAlignment="Left" VerticalAlignment="Top"/> <StackPanel x:Name="LinkPanel" HorizontalAlignment="Right" VerticalAlignment="Bottom" Orientation="Horizontal" Margin="0,0,0,5"> <Intersoft:UXNavigationButton x:Name="WelcomeLink" Content="Welcome" NavigateUri="/Home" IsDefaultNavigationSource="True" IsChecked="True" Style="{StaticResource NavigationButtonStyle}"/> <Intersoft:UXNavigationButton x:Name="ServicesLink" Content="Services" NavigateUri="/Services" Style="{StaticResource NavigationButtonStyle}"/> <Intersoft:UXNavigationButton x:Name="AboutLink" Content="About Us" NavigateUri="/AboutUs" Style="{StaticResource NavigationButtonStyle}"/> <Intersoft:UXNavigationButton x:Name="EmailLink" Content="Email Us" NavigateUri="/EmailUs" Style="{StaticResource NavigationButtonStyle}"/> </StackPanel> </Grid> |
|

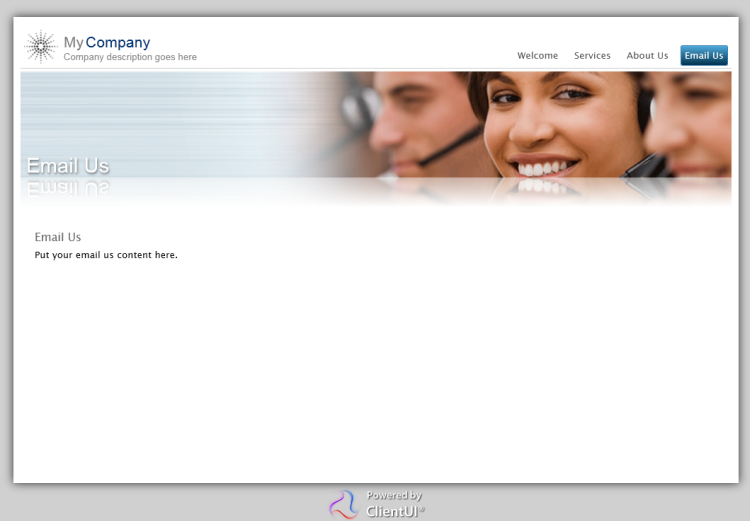
Save, build and run the project.
Click on the Email Us button to navigate to the Email Us page.
In this walkthrough, you have learned how to create ClientUI Basic Navigation Application project using Intersoft ClientUI Basic Navigation Application project template, and also creating a new page along with the button to navigate to the new page.
This section lists the complete code used in this walkthrough.
| XAML |
Copy Code
|
|---|---|
<Intersoft:UXPage xmlns="http://schemas.microsoft.com/winfx/2006/xaml/presentation" xmlns:x="http://schemas.microsoft.com/winfx/2006/xaml" xmlns:d="http://schemas.microsoft.com/expression/blend/2008" xmlns:mc="http://schemas.openxmlformats.org/markup-compatibility/2006" mc:Ignorable="d" xmlns:Intersoft="http://intersoft.clientui.com/schemas" x:Class="ClientUINavApp1.Views.EmailUs" Title="EmailUs Page" d:DesignWidth="1024" d:DesignHeight="768"> <Grid x:Name="LayoutRoot"> <Grid.RowDefinitions> <RowDefinition Height="200"></RowDefinition> <RowDefinition></RowDefinition> </Grid.RowDefinitions> <Intersoft:ContentReflector Grid.Row="0" x:Name="HeaderReflector" HorizontalAlignment="Left" ContentHeight="150" Margin="0,0,0,5.5" HorizontalContentAlignment="Left" ContentWidth="1024"> <Intersoft:ContentReflector.ReflectionBrush> <LinearGradientBrush EndPoint="0.5,1" StartPoint="0.5,0"> <GradientStop Color="#80000000" Offset="1"/> <GradientStop Color="#00000000" Offset="0.721"/> </LinearGradientBrush> </Intersoft:ContentReflector.ReflectionBrush> <Grid> <Image Source="../Assets/Images/Services.png" Stretch="Fill"/> <TextBlock Text="Email Us" VerticalAlignment="Bottom" HorizontalAlignment="Left" Margin="8,0,0,0" FontSize="29.333" Foreground="White" FontFamily="Arial"> <TextBlock.Effect> <DropShadowEffect ShadowDepth="2" Opacity="0.5"/> </TextBlock.Effect> </TextBlock> </Grid> </Intersoft:ContentReflector> <Intersoft:DockPanel Grid.Row="1"> <Intersoft:GroupBox Header="Email Us" VerticalAlignment="Top" Intersoft:DockPanel.IsFillElement="True" Margin="10" Style="{StaticResource MainContentStyle}"> <Grid> <TextBlock TextWrapping="Wrap" VerticalAlignment="Top" Text="Put your email us content here."/> </Grid> </Intersoft:GroupBox> </Intersoft:DockPanel> </Grid> </Intersoft:UXPage> |
|