
Intersoft ClientUI Documentation
Walkthrough: Create Fluid UI Layout using DockPanel

| Intersoft ClientUI 8 > ClientUI Fundamentals > Panels Overview > Panel Walkthroughs > Walkthrough: Create Fluid UI Layout using DockPanel |
This walkthrough shows you to create fluid UI layout using DockPanel.
In this walkthrough, you perform the following tasks:
You need the following components to complete this walkthrough:
The first step is to create a new ClientUI Application project using Intersoft ClientUI Application project template in Visual Studio.
This section show how to use dock panel to create fluid ui layout.
| XAML |
Copy Code
|
|---|---|
<Grid x:Name="LayoutRoot"> <Intersoft:DockPanel Name="dockPanel1" FillChildMode="Custom" /> </Grid> |
|
| Properties | Value |
|---|---|
| DockPanel.Dock | Top |
| Width | Auto |
| Height | 50 |
| Properties | Value |
|---|---|
| DockPanel.Dock | Bottom |
| Width | Auto |
| Height | 50 |
| Properties | Value |
| DockPanel.Dock: | Left |
| Width: | 50 |
| Height: | Auto |
| Properties | Value |
|---|---|
| DockPanel.Dock | Right |
| Width | 50 |
| Height | Auto |
| XAML |
Copy Code
|
|---|---|
<Intersoft:DockPanel Name="dockPanel1" FillChildMode="Custom"> <Border BorderBrush="Silver" BorderThickness="1" Height="50" Name="border1" Intersoft:DockPanel.Dock="Top" /> <Border BorderBrush="Silver" BorderThickness="1" Height="50" Name="border2" Intersoft:DockPanel.Dock="Bottom" /> <Border BorderBrush="Silver" BorderThickness="1" Name="border3" Width="50" Intersoft:DockPanel.Dock="Left" /> <Border BorderBrush="Silver" BorderThickness="1" Name="border4" Width="50" Intersoft:DockPanel.Dock="Right" /> <Border BorderBrush="Silver" BorderThickness="1" Name="border5" Intersoft:DockPanel.IsFillElement="True" /> </Intersoft:DockPanel> |
|
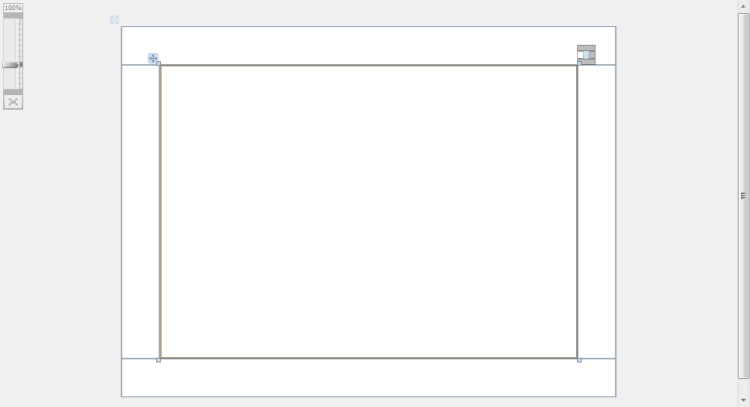
| Properties | Value |
| HorizantalAlignment: | Center |
| FontSize: | 16 |
| Text: | Sarah Brightman : Live in Vienna |
| XAML |
Copy Code
|
|---|---|
<Border BorderBrush="Silver" BorderThickness="1" Height="50" Name="border1" Intersoft:DockPanel.Dock="Top"> <TextBlock Height="23" Name="textBlock1" Text="Sarah Brightman : Live in Vienna" FontSize="16" HorizontalAlignment="Center" /> </Border> |
|
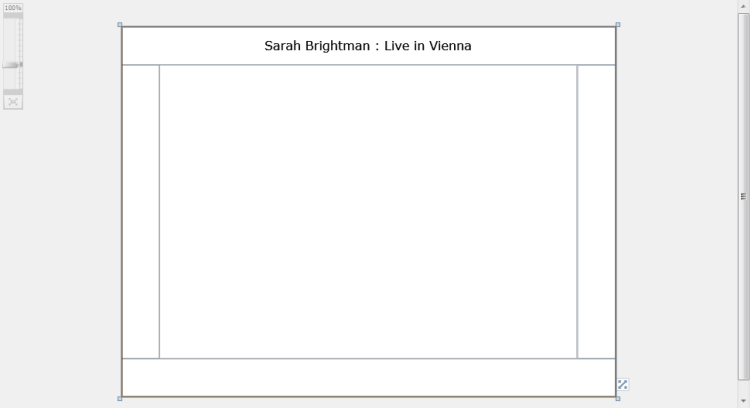
| Properties | Value |
| CornerRadius | 12 |
| Width | 24 |
| Height | 24 |
| Content | < |
| FontWeight | Bold |
| XAML |
Copy Code
|
|---|---|
<Border BorderBrush="Silver" BorderThickness="1" Name="border3" Width="50" Intersoft:DockPanel.Dock="Left"> <Intersoft:UXButton Name="uXButton1" Width="24" Height="24" CornerRadius="12" Content="<" FontWeight="Bold" /> </Border> |
|
| XAML |
Copy Code
|
|---|---|
<Border BorderBrush="Silver" BorderThickness="1" Name="border4" Width="50" Intersoft:DockPanel.Dock="Right"> <Intersoft:UXButton Content=">" CornerRadius="12" FontWeight="Bold" Height="24" Name="uXButton2" Width="24" /> </Border> |
|
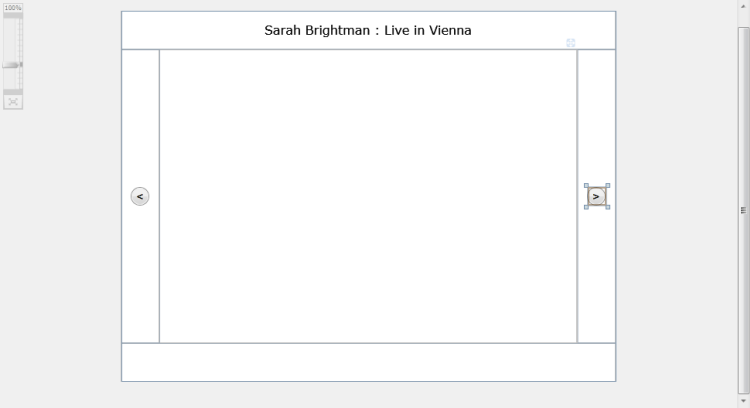
| Properties | Value |
| Orientation | Horizontal |
| HorizontalAlignment | Center |
| VerticalAlignment | Center |
| XAML |
Copy Code
|
|---|---|
<Intersoft:UXItemsControl Name="uXItemsControl1" Orientation="Horizontal" HorizontalAlignment="Center" VerticalAlignment="Center"> <Intersoft:FieldLabel Header="Artist" Name="fieldLabel1"> <Intersoft:UXTextBox HorizontalAlignment="Left" Name="uXTextBox1" Text="Sarah Brightman" VerticalAlignment="Top" /> </Intersoft:FieldLabel> </Intersoft:UXItemsControl> |
|
| XAML |
Copy Code
|
|---|---|
<Intersoft:UXItemsControl Name="uXItemsControl1" Orientation="Horizontal" HorizontalAlignment="Center" VerticalAlignment="Center"> ... <Intersoft:UXSeparator Name="uXSeparator1" Orientation="Vertical" Width="3" Height="12" /> </Intersoft:UXItemsControl>\ |
|
| XAML |
Copy Code
|
|---|---|
<Intersoft:UXItemsControl Name="uXItemsControl1" Orientation="Horizontal" HorizontalAlignment="Center" VerticalAlignment="Center"> ... <Intersoft:FieldLabel Header="Year" Name="fieldLabel2"> <Intersoft:UXTextBox HorizontalAlignment="Left" Name="uXTextBox2" Text="2009" VerticalAlignment="Top" /> </Intersoft:FieldLabel> </Intersoft:UXItemsControl>\ |
|
| XAML |
Copy Code
|
|---|---|
<Intersoft:UXItemsControl Name="uXItemsControl1" Orientation="Horizontal" HorizontalAlignment="Center" VerticalAlignment="Center"> ... <Intersoft:UXSeparator Name="uXSeparator2" Width="3" Height="12" Orientation="Vertical" /> </Intersoft:UXItemsControl> |
|
| XAML |
Copy Code
|
|---|---|
<Intersoft:UXItemsControl Name="uXItemsControl1" Orientation="Horizontal" HorizontalAlignment="Center" VerticalAlignment="Center"> ... <Intersoft:FieldLabel Header="Genre" Name="fieldLabel3"> <Intersoft:UXTextBox HorizontalAlignment="Left" Name="uXTextBox3" Text="Vocal" VerticalAlignment="Top" /> </Intersoft:FieldLabel> </Intersoft:UXItemsControl> |
|
| XAML |
Copy Code
|
|---|---|
<Border BorderBrush="Silver" BorderThickness="1" Height="50" Name="border2" Intersoft:DockPanel.Dock="Bottom"> <Intersoft:UXItemsControl Name="uXItemsControl1" Orientation="Horizontal" HorizontalAlignment="Center" VerticalAlignment="Center"> <Intersoft:FieldLabel Header="Artist" Name="fieldLabel1"> <Intersoft:UXTextBox HorizontalAlignment="Left" Name="uXTextBox1" Text="Sarah Brightman" VerticalAlignment="Top" /> </Intersoft:FieldLabel> <Intersoft:UXSeparator Name="uXSeparator1" Orientation="Vertical" Width="3" Height="12" /> <Intersoft:FieldLabel Header="Year" Name="fieldLabel2"> <Intersoft:UXTextBox HorizontalAlignment="Left" Name="uXTextBox2" Text="2009" VerticalAlignment="Top" /> </Intersoft:FieldLabel> <Intersoft:UXSeparator Name="uXSeparator2" Width="3" Height="12" Orientation="Vertical" /> <Intersoft:FieldLabel Header="Genre" Name="fieldLabel3"> <Intersoft:UXTextBox HorizontalAlignment="Left" Name="uXTextBox3" Text="Vocal" VerticalAlignment="Top" /> </Intersoft:FieldLabel> </Intersoft:UXItemsControl> </Border> |
|
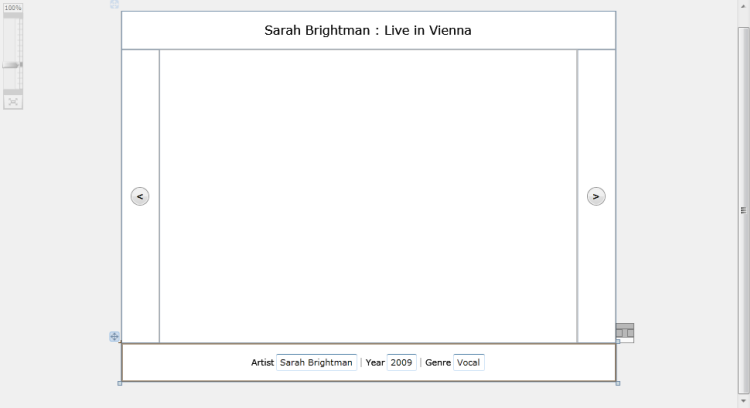
| XAML |
Copy Code
|
|---|---|
<Border BorderBrush="Silver" BorderThickness="1" Name="border5" Intersoft:DockPanel.IsFillElement="True"> <Intersoft:ImageLoader Name="imageLoader1" ImageSource="/DockPanel;component/Assets/Images/1.jpg" /> </Border> |
|
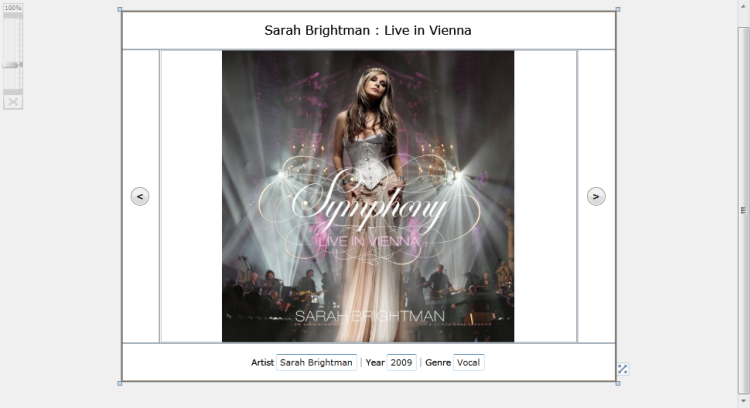
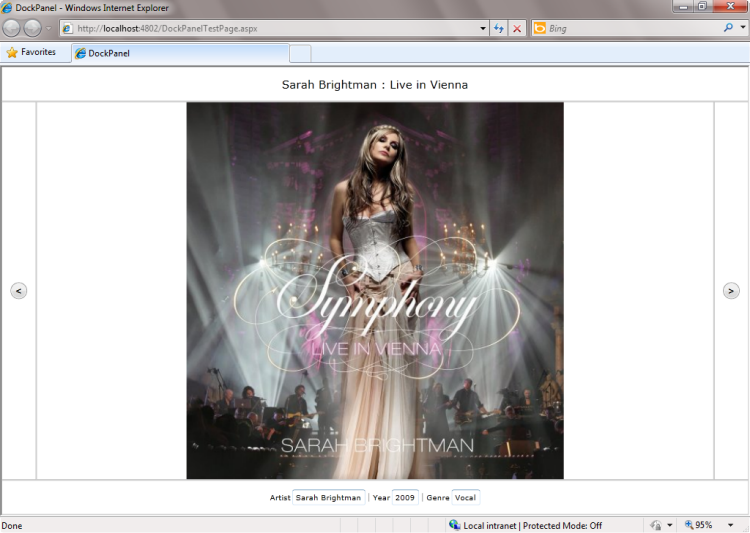
This section lists the complete code used in this walkthrough.
| XAML |
Copy Code
|
|---|---|
<Intersoft:UXPage xmlns="http://schemas.microsoft.com/winfx/2006/xaml/presentation" xmlns:x="http://schemas.microsoft.com/winfx/2006/xaml" xmlns:d="http://schemas.microsoft.com/expression/blend/2008" xmlns:mc="http://schemas.openxmlformats.org/markup-compatibility/2006" mc:Ignorable="d" xmlns:Intersoft="http://intersoft.clientui.com/schemas" x:Class="DockPanel.MainPage" Title="MainPage Page" d:DesignWidth="640" d:DesignHeight="480"> <Grid x:Name="LayoutRoot"> <Intersoft:DockPanel Name="dockPanel1" FillChildMode="Custom"> <Border BorderBrush="Silver" BorderThickness="1" Height="50" Name="border1" Intersoft:DockPanel.Dock="Top"> <TextBlock Height="23" Name="textBlock1" Text="Sarah Brightman : Live in Vienna" FontSize="16" HorizontalAlignment="Center" /> </Border> <Border BorderBrush="Silver" BorderThickness="1" Height="50" Name="border2" Intersoft:DockPanel.Dock="Bottom"> <Intersoft:UXItemsControl Name="uXItemsControl1" Orientation="Horizontal" HorizontalAlignment="Center" VerticalAlignment="Center"> <Intersoft:FieldLabel Header="Artist" Name="fieldLabel1"> <Intersoft:UXTextBox HorizontalAlignment="Left" Name="uXTextBox1" Text="Sarah Brightman" VerticalAlignment="Top" /> </Intersoft:FieldLabel> <Intersoft:UXSeparator Name="uXSeparator1" Orientation="Vertical" Width="3" Height="12" /> <Intersoft:FieldLabel Header="Year" Name="fieldLabel2"> <Intersoft:UXTextBox HorizontalAlignment="Left" Name="uXTextBox2" Text="2009" VerticalAlignment="Top" /> </Intersoft:FieldLabel> <Intersoft:UXSeparator Name="uXSeparator2" Width="3" Height="12" Orientation="Vertical" /> <Intersoft:FieldLabel Header="Genre" Name="fieldLabel3"> <Intersoft:UXTextBox HorizontalAlignment="Left" Name="uXTextBox3" Text="Vocal" VerticalAlignment="Top" /> </Intersoft:FieldLabel> </Intersoft:UXItemsControl> </Border> <Border BorderBrush="Silver" BorderThickness="1" Name="border3" Width="50" Intersoft:DockPanel.Dock="Left"> <Intersoft:UXButton Name="uXButton1" Width="24" Height="24" CornerRadius="12" Content="<" FontWeight="Bold" /> </Border> <Border BorderBrush="Silver" BorderThickness="1" Name="border4" Width="50" Intersoft:DockPanel.Dock="Right"> <Intersoft:UXButton Content=">" CornerRadius="12" FontWeight="Bold" Height="24" Name="uXButton2" Width="24" /> </Border> <Border BorderBrush="Silver" BorderThickness="1" Name="border5" Intersoft:DockPanel.IsFillElement="True"> <Intersoft:ImageLoader Name="imageLoader1" ImageSource="/DockPanel;component/Assets/Images/1.jpg" /> </Border> </Intersoft:DockPanel> </Grid> </Intersoft:UXPage> |
|