

| Intersoft ClientUI 8 > ClientUI Fundamentals > Panels Overview > Panel Walkthroughs > Walkthrough: Create Stack Layout supporting Drag-drop with UXStackPanel |
This walkthrough shows you how to create a simple UXStackPanel. This walkthrough demostrates the following concepts.
Creating Windows 7 TaskBar Panel using UXStackPanel.
Set the capability to perform drag and drop within UXStackPanel.
You need the following components to complete this walkthrough:
Visual Studio 2010
Silverlight 4 Tools for Visual Studio 2010
Intersoft ClientUI
The first step is to create a new ClientUI Application project using Intersoft ClientUI Application project template in Visual Studio.
Add a Grid.
In the Properties window, set the following properties.
| Property | Value |
|---|---|
| Height | 46 |
| MaxWidth | 500 |
| HorizontalAlignment | Stretch |
| VerticalAlignment | Center |
| XAML |
Copy Code
|
|---|---|
<Grid Height="46" MaxWidth="500" HorizontalAlignment="Stretch" VerticalAlignment="Center"> <Border Background="#FFD7D7D7"> <Border.Effect> <DropShadowEffect BlurRadius="10" ShadowDepth="0"/> </Border.Effect> </Border> </Grid> |
|
| XAML |
Copy Code
|
|---|---|
<Grid Height="46" MaxWidth="500" HorizontalAlignment="Stretch" VerticalAlignment="Center"> <Border ...> </Border> <Intersoft:DockPanel> <Intersoft:DockPanel.Background> <LinearGradientBrush EndPoint="0.5,1" StartPoint="0.5,0"> <GradientStop Color="#B2FFFFFF" Offset="0"/> <GradientStop Color="Transparent" Offset="1"/> <GradientStop Color="#99FFFFFF" Offset="0.5"/> <GradientStop Color="#7FF8F8F8" Offset="0.51"/> </LinearGradientBrush> </Intersoft:DockPanel.Background> </Intersoft:DockPanel> </Grid> |
|
Add UXStackPanel.
In the Properties window, set the following properties.
| Property | Value |
|---|---|
| x:Name | SampleControl1 |
| Intersoft:DockPanel.Dock | Left |
| AllowReorderItem | True |
| AllowRemoveItem | True |
| XAML |
Copy Code
|
|---|---|
<Intersoft:DockPanel> ... <Intersoft:UXStackPanel x:Name="SampleControl1" Intersoft:DockPanel.Dock="Left" AllowReorderItem="True" AllowRemoveItem="True" DragInit="UXStackPanel_DragInit"> </Intersoft:UXStackPanel> </Intersoft:DockPanel> |
|
Add an UXButton that is used to imitate the Windows 7 Start button.
In the Properties window, set the following properties.
| Property | Value |
|---|---|
| Intersoft:ISDragDrop.AllowDrag | False |
| Intersoft:ISDragDrop.AllowPreviousDrop | False |
| Height | 46 |
| Width | 56 |
| ImageHeight | Nan |
| ImageWidth | Nan |
| DisplayMode | Image |
| Icon | /StackPanel-Walkthrough;component/Assets/StartMenu.png |
| CornerRadius | 0 |
The Intersoft:ISDragDrop.AllowDrag and Intersoft.ISDragDrop.AllowPrevious are set to false so that the user can not drag item to area before and after this Button.
| XAML |
Copy Code
|
|---|---|
<Intersoft:UXStackPanel x:Name="SampleControl1" ...> <Intersoft:UXButton Intersoft:ISDragDrop.AllowDrag="False" Intersoft:ISDragDrop.AllowPreviousDrop="False" Height="46" Width="56" ImageHeight="NaN" ImageWidth="NaN" DisplayMode="Image" Icon="/StackPanel-Walkthrough;component/Assets/StartMenu.png" CornerRadius="0"/> </Intersoft:UXStackPanel> |
|
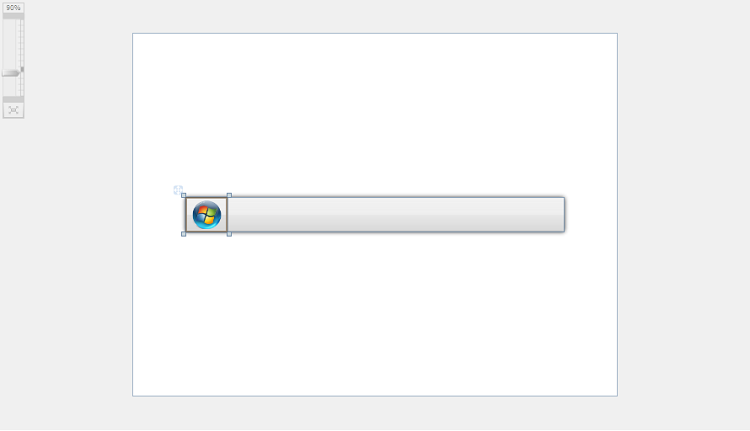
Add UXStackButton.
In the Properties window, set the following properties.
| Property | Value |
|---|---|
| StackGridHeaderText | Folders |
| Icon | /StackPanel-Walkthrough;component/Assets/Folder.png |
| StackMode | GridStyle |
| StackGridMode | AutoColumn |
| CornerRadius | 0 |
| Margin | 1,0,0,0 |
| XAML |
Copy Code
|
|---|---|
<Intersoft:UXStackPanel x:Name="SampleControl1" ...> <Intersoft:UXButton Intersoft:ISDragDrop.AllowDrag="False" .../> <Intersoft:UXStackButton StackGridHeaderText="Folders" Icon="/StackPanel-Walkthrough;component/Assets/Folder.png" StackMode="GridStyle" StackGridMode="AutoColumn" CornerRadius="0" Margin="1,0,0,0"> </Intersoft:UXStackButton> </Intersoft:UXStackPanel> |
|
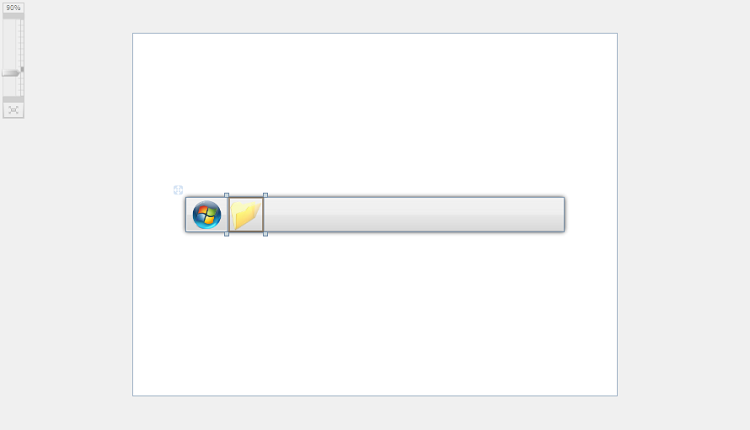
Add an UXStackItem, point the Icon property to Folder.png image file and set the Text property to Documents.
The following markup is added to XAML view.
| XAML |
Copy Code
|
|---|---|
<Intersoft:UXStackButton StackGridHeaderText="Folders" ...> <Intersoft:UXStackItem Icon="/StackPanel-Walkthrough;component/Assets/Folder.png" Text="Documents"/> </Intersoft:UXStackButton> |
|
Add another four items of UXStackItem and repeat step #3 for Libraries, Pictures, Videos, and Music.
The following markup is added to XAML view.
| XAML |
Copy Code
|
|---|---|
<Intersoft:UXStackButton StackGridHeaderText="Folders" ...> <Intersoft:UXStackItem Icon="/StackPanel-Walkthrough;component/Assets/Folder.png" Text="Documents"/> <Intersoft:UXStackItem Icon="/StackPanel-Walkthrough;component/Assets/Folder.png" Text="Libraries"/> <Intersoft:UXStackItem Icon="/StackPanel-Walkthrough;component/Assets/Folder.png" Text="Pictures"/> <Intersoft:UXStackItem Icon="/StackPanel-Walkthrough;component/Assets/Folder.png" Text="Videos"/> <Intersoft:UXStackItem Icon="/StackPanel-Walkthrough;component/Assets/Folder.png" Text="Music"/> </Intersoft:UXStackButton> |
|
Add UXStackButton.
In the Properties window, set the following properties.
| Property | Value |
|---|---|
| Icon | /StackPanel-Walkthrough;component/Assets/InternetExplorer.png |
| StackMode | MenuStyle |
| CornerRadius | 0 |
| Margin | 1,0,0,0 |
The following markup is added to XAML view.
| XAML |
Copy Code
|
|---|---|
<Intersoft:UXStackPanel x:Name="SampleControl1" ...> ... <Intersoft:UXStackButton Icon="/StackPanel-Walkthrough;component/Assets/InternetExplorer.png" StackMode="MenuStyle" CornerRadius="0" Margin="1,0,0,0"> </Intersoft:UXStackButton> </Intersoft:UXStackPanel> |
|
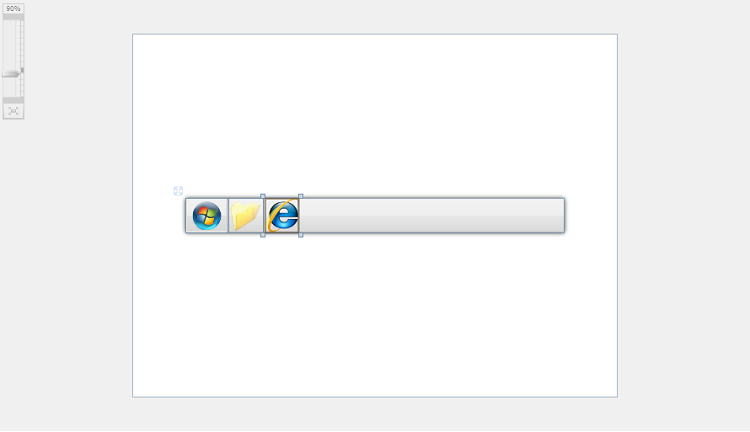
Add an UXStackItem, point the Icon property to InternetExplorer.png image file and set the Text property to www.clientui.com - Internet Explorer.
The following markup is added to XAML view.
| XAML |
Copy Code
|
|---|---|
<Intersoft:UXStackButton Icon="/StackPanel-Walkthrough;component/Assets/InternetExplorer.png" ...> <Intersoft:UXStackItem Icon="/StackPanel-Walkthrough;component/Assets/InternetExplorer.png" Text="www.clientui.com - Internet Explorer"/> </Intersoft:UXStackButton> |
|
Add another two items of UXStackItem, point the Icon property to InternetExplorer.png image file, and set the Text property to www.clientui.com - Internet Explorer, www.intersoftpt.com - Internet Explorer, and www.intersoftpt.com/community - Internet Explorer respectively.
The following markup is added to XAML view.
| XAML |
Copy Code
|
|---|---|
<Intersoft:UXStackButton Icon="/StackPanel-Walkthrough;component/Assets/InternetExplorer.png" ...> <Intersoft:UXStackItem Icon="/StackPanel-Walkthrough;component/Assets/InternetExplorer.png" Text="www.clientui.com - Internet Explorer"/> <Intersoft:UXStackItem Icon="/StackPanel-Walkthrough;component/Assets/InternetExplorer.png" Text="www.intersoftpt.com - Internet Explorer"/> <Intersoft:UXStackItem Icon="/StackPanel-Walkthrough;component/Assets/InternetExplorer.png" Text="www.intersoftpt.com/community - Internet Explorer"/> </Intersoft:UXStackButton> |
|
Add UXStackButton.
In the Properties window, set the following properties.
| Property | Value |
|---|---|
| Icon | /StackPanel-Walkthrough;component/Assets/WindowsLive.png |
| StackMode | MenuStyle |
| CornerRadius | 0 |
| Margin | 1,0,0,0 |
The following markup is added to XAML view.
| XAML |
Copy Code
|
|---|---|
<Intersoft:UXStackPanel x:Name="SampleControl1" ...> <Intersoft:UXStackButton Icon="/StackPanel-Walkthrough;component/Assets/WindowsLive.png" StackMode="MenuStyle" CornerRadius="0" Margin="1,0,0,0"> </Intersoft:UXStackButton> </Intersoft:UXStackPanel> |
|
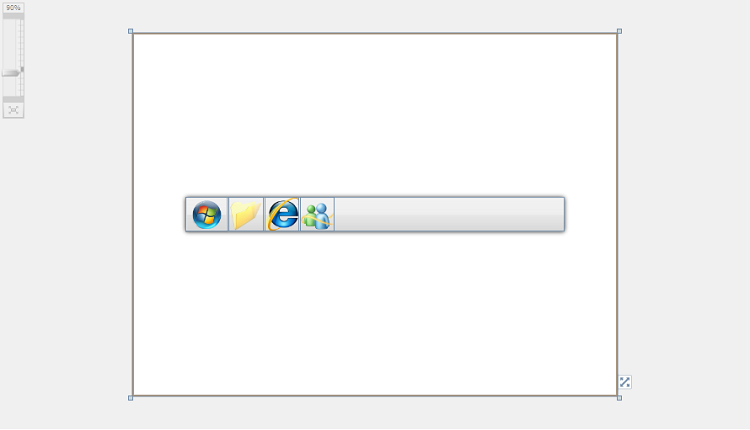
Add an UXStackItem, point the Iconproperty to WindowsLive.png image file and set the Text property to Windows Live Messanger.
The following markup is added to XAML view.
| XAML |
Copy Code
|
|---|---|
<Intersoft:UXStackButton Icon="/StackPanel-Walkthrough;component/Assets/WindowsLive.png" ...> <Intersoft:UXStackItem Icon="/StackPanel-Walkthrough;component/Assets/WindowsLive.png" Text="Windows Live Messanger"/> </Intersoft:UXStackButton> |
|
Add another four items of UXStackItem, point the Iconproperty to WindowsLive.png image file, and set the Text property to John Doe (Busy), Jane Doe <jane@my-works.com>, Michael <michael@my-works.com>, Vina <vina@my-works.com> respectively.
The following markup is added to XAML view.
| XAML |
Copy Code
|
|---|---|
<Intersoft:UXStackButton Icon="/StackPanel-Walkthrough;component/Assets/WindowsLive.png" ...> <Intersoft:UXStackItem Icon="/StackPanel-Walkthrough;component/Assets/WindowsLive.png" Text="Windows Live Messanger"/> <Intersoft:UXStackItem Icon="/StackPanel-Walkthrough;component/Assets/WindowsLive.png" Text="John Doe (Busy)"/> <Intersoft:UXStackItem Icon="/StackPanel-Walkthrough;component/Assets/WindowsLive.png" Text="Jane Doe <jane@my-works.com>"/> <Intersoft:UXStackItem Icon="/StackPanel-Walkthrough;component/Assets/WindowsLive.png" Text="Michael <michael@my-works.com>"/> <Intersoft:UXStackItem Icon="/StackPanel-Walkthrough;component/Assets/WindowsLive.png" Text="Vina <vina@my-works.com>"/> </Intersoft:UXStackButton> |
|
Add UXStackButton.
In the Properties window, set the following properties.
| Property | Value |
|---|---|
| Icon | /StackPanel-Walkthrough;component/Assets/VisualStudio2010.png |
| StackMode | GridStyle |
| StackGridMode | AutoColumn |
| CornerRadius | 0 |
| Margin | 1,0,0,0 |
The following markup is added to XAML view.
| XAML |
Copy Code
|
|---|---|
<Intersoft:UXStackButton Icon="/StackPanel-Walkthrough;component/Assets/VisualStudio2010.png" StackMode="GridStyle" StackGridMode="AutoColumn" CornerRadius="0" Margin="1,0,0,0"> </Intersoft:UXStackButton> |
|
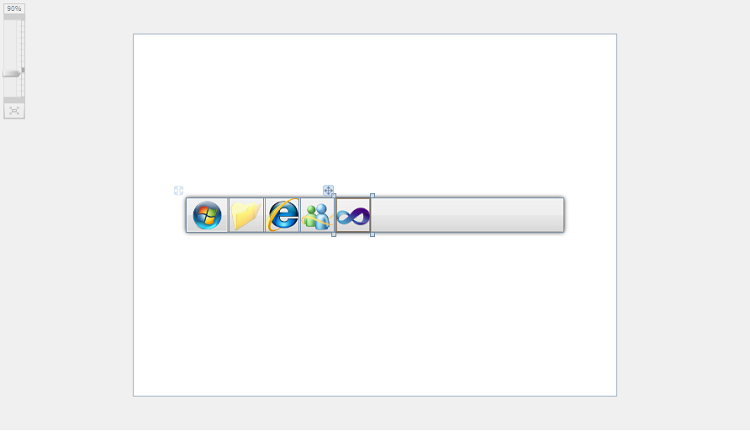
Add an UXStackItem, point the Icon property to VisualStudio2010.png image file and set the Text property to Navigation Sample.
The following markup is added to XAML view.
| XAML |
Copy Code
|
|---|---|
<Intersoft:UXStackButton Icon="/StackPanel-Walkthrough;component/Assets/VisualStudio2010.png" ...> <Intersoft:UXStackItem Icon="/StackPanel-Walkthrough;component/Assets/VisualStudio2010.png" Text="Navigation Sample"/> </Intersoft:UXStackButton> |
|
Repeat step #3 and set the new UXStackItem Icon property to MVVM Sample.
The following markup is added to XAML view.
| XAML |
Copy Code
|
|---|---|
<Intersoft:UXStackButton Icon="/StackPanel-Walkthrough;component/Assets/VisualStudio2010.png" ...> <Intersoft:UXStackItem Icon="/StackPanel-Walkthrough;component/Assets/VisualStudio2010.png" Text="Navigation Sample"/> <Intersoft:UXStackItem Icon="/StackPanel-Walkthrough;component/Assets/VisualStudio2010.png" Text="MVVM Sample"/> </Intersoft:UXStackButton> |
|
Add UXStackButton.
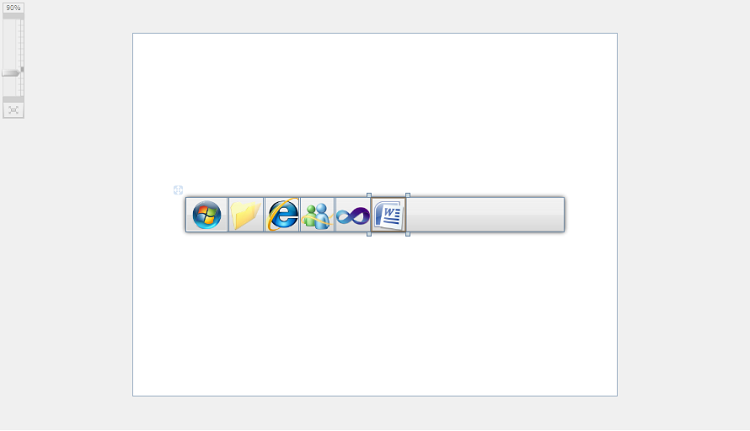
In the Properties window, point the Icon property to MicrosoftWord.png, set the CornerRadiusto 0, and set the Margin property to 1,0,0,0.
The following markup is added to XAML view.
| XAML |
Copy Code
|
|---|---|
<Intersoft:UXStackButton Icon="/StackPanel-Walkthrough;component/Assets/MicrosoftWord.png" CornerRadius="0" Margin="1,0,0,0"/> |
|
Add a StackPanel.
Set the value of Dock property to Right, VerticalAlignment to Center, and Margin to 8,0.
The following markup is added to XAML view.
| XAML |
Copy Code
|
|---|---|
<StackPanel Intersoft:DockPanel.Dock="Right" VerticalAlignment="Center" Margin="8,0"> </StackPanel> |
|
Add a TextBlock into the StackPanel.
In the Properties window, set the following properties.
| Property | Value |
|---|---|
| Text | 7:17 AM |
| HorizontalAlignment | Right |
| FontSize | 9 |
| Margin | 0,1 |
The following markup is added to XAML view.
| XAML |
Copy Code
|
|---|---|
<StackPanel Intersoft:DockPanel.Dock="Right" ...> <TextBlock Text="7:17 AM" HorizontalAlignment="Right" FontSize="9" Margin="0,1"/> |
|
Add another TextBlock into the StackPanel
Repeat step #4 and set the value of Text property to 7/7/2010.
The following markup is added to XAML view.
| XAML |
Copy Code
|
|---|---|
<StackPanel Intersoft:DockPanel.Dock="Right" ...> <TextBlock Text="7:17 AM" .../> <TextBlock Text="7/7/2010" HorizontalAlignment="Right" FontSize="9" Margin="0,1"/> </StackPanel> |
|
On the File menu, click Save All.
Run the application.
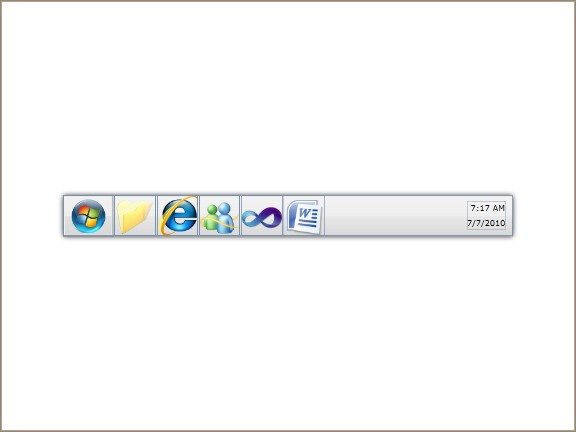
| XAML |
Copy Code
|
|---|---|
<Intersoft:UXPage xmlns="http://schemas.microsoft.com/winfx/2006/xaml/presentation" xmlns:x="http://schemas.microsoft.com/winfx/2006/xaml" xmlns:d="http://schemas.microsoft.com/expression/blend/2008" xmlns:mc="http://schemas.openxmlformats.org/markup-compatibility/2006" mc:Ignorable="d" xmlns:Intersoft="http://intersoft.clientui.com/schemas" x:Class="StackPanel_Walkthrough.MainPage" Title="MainPage Page" d:DesignWidth="640" d:DesignHeight="480"> <Grid x:Name="LayoutRoot"> <Grid Height="46" MaxWidth="500" HorizontalAlignment="Stretch" VerticalAlignment="Center"> <Border Background="#FFD7D7D7"> <Border.Effect> <DropShadowEffect BlurRadius="10" ShadowDepth="0"/> </Border.Effect> </Border> <Intersoft:DockPanel> <Intersoft:DockPanel.Background> <LinearGradientBrush EndPoint="0.5,1" StartPoint="0.5,0"> <GradientStop Color="#B2FFFFFF" Offset="0"/> <GradientStop Color="Transparent" Offset="1"/> <GradientStop Color="#99FFFFFF" Offset="0.5"/> <GradientStop Color="#7FF8F8F8" Offset="0.51"/> </LinearGradientBrush> </Intersoft:DockPanel.Background> <Intersoft:UXStackPanel x:Name="SampleControl1" Intersoft:DockPanel.Dock="Left" AllowReorderItem="True" AllowRemoveItem="True" DragInit="UXStackPanel_DragInit"> <Intersoft:UXButton Intersoft:ISDragDrop.AllowDrag="False" Intersoft:ISDragDrop.AllowPreviousDrop="False" Height="46" Width="56" ImageHeight="NaN" ImageWidth="NaN" DisplayMode="Image" Icon="/StackPanel-Walkthrough;component/Assets/StartMenu.png" CornerRadius="0"/> <Intersoft:UXStackButton StackGridHeaderText="Folders" Icon="/StackPanel-Walkthrough;component/Assets/Folder.png" StackMode="GridStyle" StackGridMode="AutoColumn" CornerRadius="0" Margin="1,0,0,0"> <Intersoft:UXStackItem Icon="/StackPanel-Walkthrough;component/Assets/Folder.png" Text="Documents"/> <Intersoft:UXStackItem Icon="/StackPanel-Walkthrough;component/Assets/Folder.png" Text="Libraries"/> <Intersoft:UXStackItem Icon="/StackPanel-Walkthrough;component/Assets/Folder.png" Text="Pictures"/> <Intersoft:UXStackItem Icon="/StackPanel-Walkthrough;component/Assets/Folder.png" Text="Videos"/> <Intersoft:UXStackItem Icon="/StackPanel-Walkthrough;component/Assets/Folder.png" Text="Music"/> </Intersoft:UXStackButton> <Intersoft:UXStackButton Icon="/StackPanel-Walkthrough;component/Assets/InternetExplorer.png" StackMode="MenuStyle" CornerRadius="0" Margin="1,0,0,0"> <Intersoft:UXStackItem Icon="/StackPanel-Walkthrough;component/Assets/InternetExplorer.png" Text="www.clientui.com - Internet Explorer"/> <Intersoft:UXStackItem Icon="/StackPanel-Walkthrough;component/Assets/InternetExplorer.png" Text="www.intersoftpt.com - Internet Explorer"/> <Intersoft:UXStackItem Icon="/StackPanel-Walkthrough;component/Assets/InternetExplorer.png" Text="www.intersoftpt.com/community - Internet Explorer"/> </Intersoft:UXStackButton> <Intersoft:UXStackButton Icon="/StackPanel-Walkthrough;component/Assets/WindowsLive.png" StackMode="MenuStyle" CornerRadius="0" Margin="1,0,0,0"> <Intersoft:UXStackItem Icon="/StackPanel-Walkthrough;component/Assets/WindowsLive.png" Text="Windows Live Messanger"/> <Intersoft:UXStackItem Icon="/StackPanel-Walkthrough;component/Assets/WindowsLive.png" Text="John Doe (Busy)"/> <Intersoft:UXStackItem Icon="/StackPanel-Walkthrough;component/Assets/WindowsLive.png" Text="Jane Doe <jane@my-works.com>"/> <Intersoft:UXStackItem Icon="/StackPanel-Walkthrough;component/Assets/WindowsLive.png" Text="Michael <michael@my-works.com>"/> <Intersoft:UXStackItem Icon="/StackPanel-Walkthrough;component/Assets/WindowsLive.png" Text="Vina <vina@my-works.com>"/> </Intersoft:UXStackButton> <Intersoft:UXStackButton Icon="/StackPanel-Walkthrough;component/Assets/VisualStudio2010.png" StackMode="GridStyle" StackGridMode="AutoColumn" CornerRadius="0" Margin="1,0,0,0"> <Intersoft:UXStackItem Icon="/StackPanel-Walkthrough;component/Assets/VisualStudio2010.png" Text="Navigation Sample"/> <Intersoft:UXStackItem Icon="/StackPanel-Walkthrough;component/Assets/VisualStudio2010.png" Text="MVVM Sample"/> </Intersoft:UXStackButton> <Intersoft:UXStackButton Icon="/StackPanel-Walkthrough;component/Assets/MicrosoftWord.png" CornerRadius="0" Margin="1,0,0,0"/> </Intersoft:UXStackPanel> <StackPanel Intersoft:DockPanel.Dock="Right" VerticalAlignment="Center" Margin="8,0"> <TextBlock Text="7:17 AM" HorizontalAlignment="Right" FontSize="9" Margin="0,1"/> <TextBlock Text="7/7/2010" HorizontalAlignment="Right" FontSize="9" Margin="0,1"/> </StackPanel> </Intersoft:DockPanel> </Grid> </Grid> </Intersoft:UXPage> |
|
| C# |
Copy Code
|
|---|---|
using System; using System.Collections.Generic; using System.Linq; using System.Net; using System.Windows; using System.Windows.Controls; using System.Windows.Documents; using System.Windows.Input; using System.Windows.Media; using System.Windows.Media.Animation; using System.Windows.Shapes; using Intersoft.Client.UI.Navigation; using Intersoft.Client.UI.Aqua.UXStackMenu; namespace StackPanel_Walkthrough { public partial class MainPage : UXPage { public MainPage() { InitializeComponent(); } // Executes when the user navigates to this page. protected override void OnNavigatedTo(NavigationEventArgs e) { } private void UXStackPanel_DragInit(object sender, Intersoft.Client.UI.Controls.Interactivity.DragEventArgs e) { UXStackButton button = e.OriginalSource as UXStackButton; button.ResetState(); button.ResetAutoShowTimer(); } } } |
|