
| Intersoft ClientUI 8 > ClientUI Fundamentals > MVVM Pattern Overview > MVVM Pattern Walkthroughs > Walkthrough: Use Command Binding and Key Binding with MVVM Pattern |
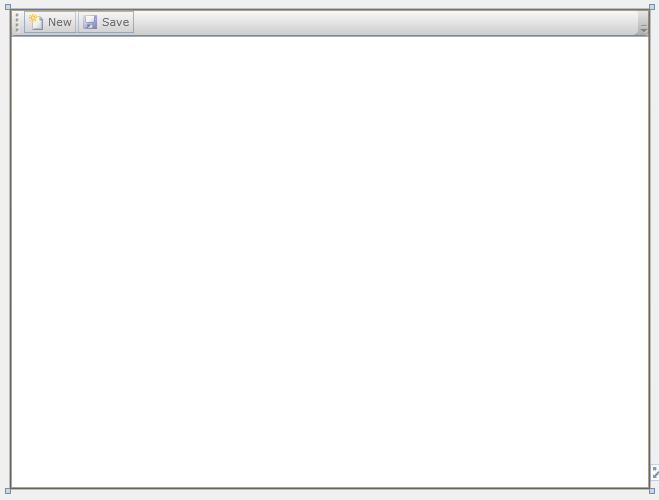
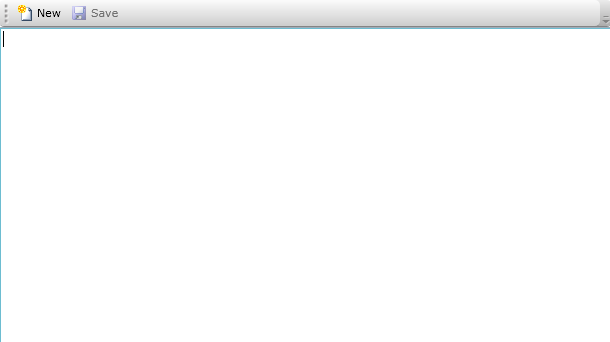
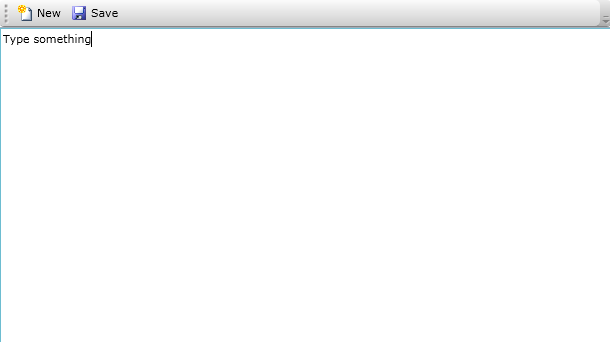
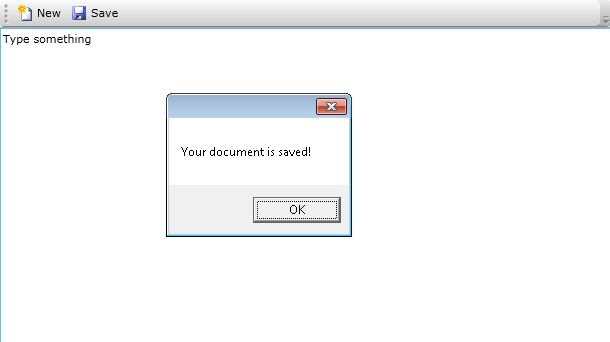
This walkthrough shows how to use command binding and key binding in a simple text editing application.
In this walkthrough, you perform the following tasks:
Create the routed commands.
Create command binding and bind the commands to event handlers.
Create input key binding and bind the key gesture to the commands.
You need the following components to complete this walkthrough:
Silverlight 4 Tools for Visual Studio 2010
Intersoft ClientUI
The first step is to create an Intersoft Application project using the provided Intersoft ClientUI Application project template.
This section shows you how to create simple text editing application to demonstrate command binding and key binding.
| XAML |
Copy Code
|
|---|---|
<Grid x:Name="LayoutRoot"> <Intersoft:DockPanel FillChildMode="Custom"> <Intersoft:CommandManager.CommandBindings> <Intersoft:CommandBindingCollection> <Intersoft:CommandBinding Command="Commands:ApplicationCommands.New" CanExecute="CommandBinding_CanExecute" Executed="CommandBinding_Executed"/> <Intersoft:CommandBinding Command="Commands:ApplicationCommands.Save" CanExecute="CommandBinding_CanExecute" Executed="CommandBinding_Executed"/> </Intersoft:CommandBindingCollection> </Intersoft:CommandManager.CommandBindings> <Intersoft:CommandManager.InputBindings> <Intersoft:InputBindingCollection> <Intersoft:KeyBinding Command="Commands:ApplicationCommands.New" Gesture="Ctrl+Shift+N"/> <Intersoft:KeyBinding Command="Commands:ApplicationCommands.Save" Gesture="Ctrl+Shift+S"/> </Intersoft:InputBindingCollection> </Intersoft:CommandManager.InputBindings> <Intersoft:UXToolBar Intersoft:DockPanel.Dock="Top"> <Intersoft:UXToolGroup> <Intersoft:UXToolBarButton Content="New" DisplayMode="ContentAndImage" Icon="Assets/Images/NewDocumentHS.png" Command="Commands:ApplicationCommands.New"/> <Intersoft:UXToolBarButton Content="Save" DisplayMode="ContentAndImage" Icon="Assets/Images/saveHS.png" Command="Commands:ApplicationCommands.Save"/> </Intersoft:UXToolGroup> </Intersoft:UXToolBar> <RichTextBox x:Name="RichTextBox1" Intersoft:DockPanel.Dock="Bottom" Intersoft:DockPanel.IsFillElement="True"/> </Intersoft:DockPanel> </Grid> |
|

| C# |
Copy Code
|
|---|---|
public static class ApplicationCommands { private static readonly RoutedUICommand NewCommand = new RoutedUICommand("New", "New", typeof(ApplicationCommands)); private static readonly RoutedUICommand SaveCommand = new RoutedUICommand("Save", "Save", typeof(ApplicationCommands)); public static RoutedUICommand Save { get { return SaveCommand; } } public static RoutedUICommand New { get { return NewCommand; } } public static void Initialize() { // empty initializer } } |
|
| XAML |
Copy Code
|
|---|---|
<Intersoft:DockPanel FillChildMode="Custom"> <Intersoft:CommandManager.CommandBindings> <Intersoft:CommandBindingCollection> <Intersoft:CommandBinding Command="Commands:ApplicationCommands.New" CanExecute="CommandBinding_CanExecute" Executed="CommandBinding_Executed"/> <Intersoft:CommandBinding Command="Commands:ApplicationCommands.Save" CanExecute="CommandBinding_CanExecute" Executed="CommandBinding_Executed"/> </Intersoft:CommandBindingCollection> </Intersoft:CommandManager.CommandBindings> .... </Intersoft:DockPanel> |
|
| XAML |
Copy Code
|
|---|---|
<Intersoft:DockPanel FillChildMode="Custom"> .... <Intersoft:CommandManager.InputBindings> <Intersoft:InputBindingCollection> <Intersoft:KeyBinding Command="Commands:ApplicationCommands.New" Gesture="Ctrl+Shift+N"/> <Intersoft:KeyBinding Command="Commands:ApplicationCommands.Save" Gesture="Ctrl+Shift+S"/> </Intersoft:InputBindingCollection> </Intersoft:CommandManager.InputBindings> .... </Intersoft:DockPanel> |
|
| XAML |
Copy Code
|
|---|---|
<Intersoft:DockPanel FillChildMode="Custom"> .... <Intersoft:UXToolBar Intersoft:DockPanel.Dock="Top"> <Intersoft:UXToolGroup> <Intersoft:UXToolBarButton Content="New" DisplayMode="ContentAndImage" Icon="Assets/Images/NewDocumentHS.png" Command="Commands:ApplicationCommands.New"/> <Intersoft:UXToolBarButton Content="Save" DisplayMode="ContentAndImage" Icon="Assets/Images/saveHS.png" Command="Commands:ApplicationCommands.Save"/> </Intersoft:UXToolGroup> </Intersoft:UXToolBar> </Intersoft:DockPanel> |
|
| XAML |
Copy Code
|
|---|---|
<Intersoft:DockPanel FillChildMode="Custom"> .... <RichTextBox x:Name="RichTextBox1" Intersoft:DockPanel.Dock="Bottom" Intersoft:DockPanel.IsFillElement="True" ContentChanged="RichTextBox_ContentChanged"/> </Intersoft:DockPanel> |
|
| C# |
Copy Code
|
|---|---|
public MainPage()
{
    ApplicationCommands.Initialize();
    InitializeComponent();
} |
|
| C# |
Copy Code
|
|---|---|
private bool _isDirty; private bool IsDirty { get { return this._isDirty; } set { if (this._isDirty != value) { this._isDirty = value; CommandManager.InvalidateRequerySuggested(); } } } |
|
| C# |
Copy Code
|
|---|---|
private void CommandBinding_CanExecute(object sender, CanExecuteRoutedEventArgs e) { if (e.Command == ApplicationCommands.New) { e.CanExecute = true; } else if (e.Command == ApplicationCommands.Save) { e.CanExecute = this.IsDirty; } } private void CommandBinding_Executed(object sender, ExecutedRoutedEventArgs e) { if (e.Command == ApplicationCommands.New) { this.RichTextBox1.SelectAll(); this.RichTextBox1.Selection.Insert(new Paragraph()); } else if (e.Command == ApplicationCommands.Save) { this.IsDirty = false; MessageBox.Show("Your document is saved!"); } } |
|
| C# |
Copy Code
|
|---|---|
private void RichTextBox_ContentChanged(object sender, ContentChangedEventArgs e) { if (!this.IsDirty) { this.IsDirty = true; } } |
|


In this walkthrough, you have learned how to create commands and also create the command bindings and the key bindings declaratively in XAML. You have also learned how to handle each commands in the code behind.
This section lists the complete code used in this walkthrough.
| C# |
Copy Code
|
|---|---|
using Intersoft.Client.Framework.Input; namespace ClientUIApplication1.Commands { public static class ApplicationCommands { private static readonly RoutedUICommand NewCommand = new RoutedUICommand("New", "New", typeof(ApplicationCommands)); private static readonly RoutedUICommand SaveCommand = new RoutedUICommand("Save", "Save", typeof(ApplicationCommands)); public static RoutedUICommand Save { get { return SaveCommand; } } public static RoutedUICommand New { get { return NewCommand; } } public static void Initialize() { // empty initializer } } } |
|
| XAML |
Copy Code
|
|---|---|
<Intersoft:UXPage xmlns="http://schemas.microsoft.com/winfx/2006/xaml/presentation" xmlns:x="http://schemas.microsoft.com/winfx/2006/xaml" xmlns:d="http://schemas.microsoft.com/expression/blend/2008" xmlns:mc="http://schemas.openxmlformats.org/markup-compatibility/2006" mc:Ignorable="d" xmlns:Intersoft="http://intersoft.clientui.com/schemas" xmlns:Commands="clr-namespace:ClientUIApplication1.Commands" x:Class="ClientUIApplication1.MainPage" Title="MainPage Page" d:DesignWidth="640" d:DesignHeight="480"> <Grid x:Name="LayoutRoot"> <Intersoft:DockPanel FillChildMode="Custom"> <Intersoft:CommandManager.CommandBindings> <Intersoft:CommandBindingCollection> <Intersoft:CommandBinding Command="Commands:ApplicationCommands.New" CanExecute="CommandBinding_CanExecute" Executed="CommandBinding_Executed"/> <Intersoft:CommandBinding Command="Commands:ApplicationCommands.Save" CanExecute="CommandBinding_CanExecute" Executed="CommandBinding_Executed"/> </Intersoft:CommandBindingCollection> </Intersoft:CommandManager.CommandBindings> <Intersoft:CommandManager.InputBindings> <Intersoft:InputBindingCollection> <Intersoft:KeyBinding Command="Commands:ApplicationCommands.New" Gesture="Ctrl+Shift+N"/> <Intersoft:KeyBinding Command="Commands:ApplicationCommands.Save" Gesture="Ctrl+Shift+S"/> </Intersoft:InputBindingCollection> </Intersoft:CommandManager.InputBindings> <Intersoft:UXToolBar Intersoft:DockPanel.Dock="Top"> <Intersoft:UXToolGroup> <Intersoft:UXToolBarButton Content="New" DisplayMode="ContentAndImage" Icon="Assets/Images/NewDocumentHS.png" Command="Commands:ApplicationCommands.New"/> <Intersoft:UXToolBarButton Content="Save" DisplayMode="ContentAndImage" Icon="Assets/Images/saveHS.png" Command="Commands:ApplicationCommands.Save"/> </Intersoft:UXToolGroup> </Intersoft:UXToolBar> <RichTextBox x:Name="RichTextBox1" Intersoft:DockPanel.Dock="Bottom" Intersoft:DockPanel.IsFillElement="True" ContentChanged="RichTextBox_ContentChanged"/> </Intersoft:DockPanel> </Grid> </Intersoft:UXPage> |
|
| C# |
Copy Code
|
|---|---|
using System.Windows; using System.Windows.Controls; using System.Windows.Documents; using ClientUIApplication1.Commands; using Intersoft.Client.Framework.Input; using Intersoft.Client.UI.Navigation; namespace ClientUIApplication1 { public partial class MainPage : UXPage { private bool _isDirty; private bool IsDirty { get { return this._isDirty; } set { if (this._isDirty != value) { this._isDirty = value; CommandManager.InvalidateRequerySuggested(); } } } public MainPage() { ApplicationCommands.Initialize(); InitializeComponent(); } // Executes when the user navigates to this page. protected override void OnNavigatedTo(NavigationEventArgs e) { } private void CommandBinding_CanExecute(object sender, CanExecuteRoutedEventArgs e) { if (e.Command == ApplicationCommands.New) { e.CanExecute = true; } else if (e.Command == ApplicationCommands.Save) { e.CanExecute = this.IsDirty; } } private void CommandBinding_Executed(object sender, ExecutedRoutedEventArgs e) { if (e.Command == ApplicationCommands.New) { this.RichTextBox1.SelectAll(); this.RichTextBox1.Selection.Insert(new Paragraph()); } else if (e.Command == ApplicationCommands.Save) { this.IsDirty = false; MessageBox.Show("Your document is saved!"); } } private void RichTextBox_ContentChanged(object sender, ContentChangedEventArgs e) { if (!this.IsDirty) { this.IsDirty = true; } } } } |
|