
| Intersoft ClientUI 8 > ClientUI Controls > Control Library > Advanced Input Controls Overview > UXFileUpload > UXFileUpload Advanced Features |
UXFileUpload is a full-featured file upload control designed for Silverlight 3, Silverlight 4 and WPF. To learn the basics and key features of the UXFileUpload control, see UXFileUpload Overview.
This topic discusses more advanced upload features in depth, which contains the following topics.
UXFileUpload features a rich user interface that allows users to intuitively work with file uploading task. By default, UXFileUpload shows the default icon of each file in the upload list. The default icon is used when there are no icons found for a particular file type, which can be customized in the DefaultFileTypeIcon property. You can also hide the file type icon by setting the ShowFileTypeIcon property to false.
To make the upload interface more compelling to users, you may want to assign an icon to each file type that your application recognizes. For instances, showing a document icon for .doc, .docx. and .rtf file type.
You add a FileTypeIcon instance to the FileTypeIcons collection of the upload control. A FileTypeIcon instance can represent multiple file types by separating each type with ; character.
The following example shows how to add icons to document and spreadsheet file types.
| XAML |
Copy Code
|
|---|---|
<Intersoft:UXFileUpload ServiceUrl="http://localhost:1825/UXFileUploadHandler.ashx" TargetFolder="~/Upload"> <Intersoft:UXFileUpload.FileTypeIcons> <Intersoft:FileTypeIcon Extension=".txt;.doc;.docx;.rtf" Icon="/Assets/Images/document.png"/> <Intersoft:FileTypeIcon Extension=".zip;.rar;.iso;.gz" Icon="/Assets/Images/spreadsheet.png"/> </Intersoft:UXFileUpload.FileTypeIcons> </Intersoft:UXFileUpload> |
|
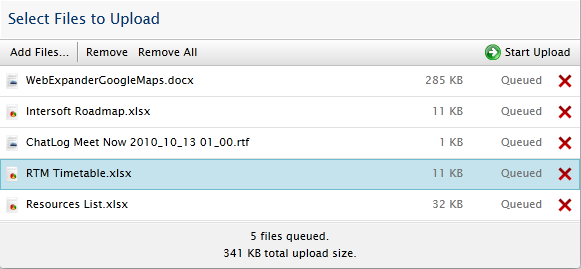
The results look like the following illustration. Notice that each file entry shows the icon according to their file type.
UXFileUpload is a rich composite control that contains a large number of textual contents to operate properly, for instances, the text that appears in the toolbar button, uploading status, upload statistics and more. All textual resources in UXFileUpload are streamlined in a resource file that can be easily localized. The default resource shipped in this release only contains English culture.
The localized resources in UXFileUpload is powered by ClientUI Localization Framework which exposes a number of advantages and flexiblity compared to the traditional Silverlight's resource manager such as MVVM support, automatic resource update and dynamic culture change. For more information on the localization framework and its features, see ClientUI Localization Overview.
Managed by the localization framework, you can easily override certain localized resource in UXFileUpload without affecting the other resources. You specify the ResourceOverride property to a new instance of UXFileUploadResource object, and provide a new value to the desired resource. Since the UXFileUploadResource encapsulates all the resources with strong-typed properties, you can easily see a list of localized resources and select the desired resources to override.
The following example shows how to override the AddFiles resource to a new value.
| XAML |
Copy Code
|
|---|---|
<Intersoft:UXFileUpload ServiceUrl="http://localhost:1825/UXFileUploadHandler.ashx" TargetFolder="~/Upload"> <Intersoft:UXFileUpload.ResourceOverride> <Intersoft:UXFileUploadResource AddFiles="Browse..."/> </Intersoft:UXFileUpload.ResourceOverride> </Intersoft:UXFileUpload> |
|
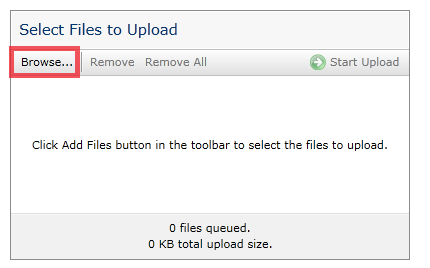
When you run the application in browser, you can notice that the resource for Add Files button has changed to Browse, while the other resources remaining unaffected, such as shown in the following illustration.
UXFileUpload is a mixed of state-of-the-art user interface and modern architecture which enables the user interface to be completely customized without affecting the core functionality of the upload control. It takes advantage of commanding, multi binding, visual states and data templates to achieve a truly loosely-coupled user interface design.
UXFileUpload is comprised of three core visual states such as explained in the following sections.
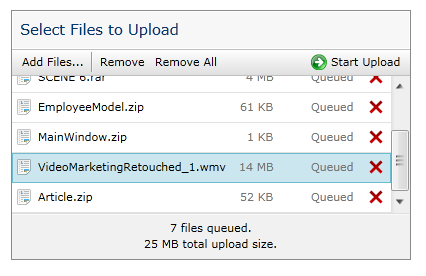
The SelectFiles visual state displays the user interface for obtaining user input. This state generally shows commands such as Add Files and Start Upload, as well as the list box that shows the selected files.
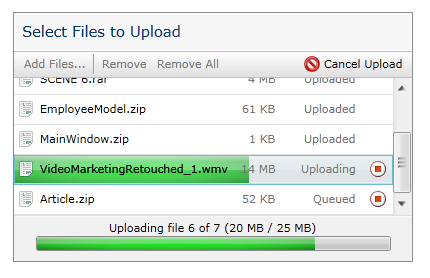
The Uploading visual state displays the user interface when the upload session is in progress. This state shows a total progress bar and upload statistics. Commands that are no longer executable in this context would be hidden automatically.
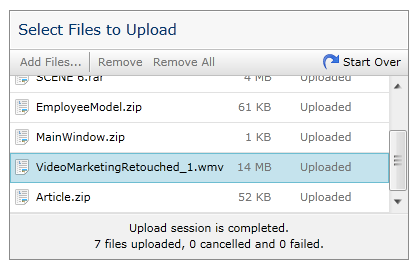
The Uploaded visual state displays the user interface when the upload session completes. This state generally shows the results and upload statistics, as well as a button to restart the upload session.
 |
UXFileUpload uses MVVM design pattern approach in building the user interface and data communication through the means of binding. Consequently, UXFileUpload does not have strong reference to the UI elements and does not actually know the existence of the UI elements. As the results, you can change the user interface completely, for instances, changing the add button with a hyperlink, changing the progress bar with a busy indicator, adding new elements in certain visual state, or even completely redefine the entire user interface to your liking. |
To learn how to customize the user interface of UXFileUpload control to achieve a number of common business scenarios, please see the links in the following.
How-to: Customize UXFileUpload to a Simple Photo Uploader
How-to: Customize UXFileUpload to an Outlook-style Attachment Uploader
How-to: Customize UXFileUpload to a Gmail-style Inline Uploader
In most cases, you can configure common settings in the UXFileUpload control, such as the TargetFolder, TargetPhysicalFolder, OverwriteExistingFiles and more. However, in certain cases where you have multiple applications that require centralized consolidated settings, it is more efficient to override all the settings in the server-side rather than in the multiple client applications.
The built-in UXFileUpload server handler is designed with a great level of customizability, allowing you to inherit the UXFileUploadHandler class and override the properties as necessary. You can also customize the upload processing logic if needed, by overriding the provided methods.
The following list describes the properties that can be overridden:
The following list describes the methods that can be overridden:
The following example shows how to override the OverwriteExistingFiles property to true, which discards the setting sent by the upload client.
| CS |
Copy Code
|
|---|---|
using System; using System.Web; using Intersoft.UXFileUpload.Server; namespace ClientUIApplication1.Web { public class MyUploadHandler : UXFileUploadHandler { public override bool OverwriteExistingFiles { get { // always return true regardless of client setting return true; } set { base.OverwriteExistingFiles = value; } } } } |
|
UXFileUpload provides capability for developers to send custom headers and post data in each upload request, which is particularly useful in scenarios where you need to upload application-specific data along with the upload request.
When specified, the custom headers can be accessed in the server-side through the Request.Headers collection. The custom post data can be retreieved through the Request.Form collection.
The following example shows how to add custom headers and custom post data in the upload control.
| XAML |
Copy Code
|
|---|---|
<Intersoft:UXFileUpload ServiceUrl="http://localhost:1825/UXFileUploadHandler.ashx" TargetFolder="~/Upload"> <Intersoft:UXFileUpload.CustomHeaders> <Intersoft:FileUploadCustomData Key="SomeCustomHeader" Value="Header"/> </Intersoft:UXFileUpload.CustomHeaders> <Intersoft:UXFileUpload.CustomPostData> <Intersoft:FileUploadCustomData Key="SomeCustomData" Value="PostData"/> </Intersoft:UXFileUpload.CustomPostData> </Intersoft:UXFileUpload> |
|
UXFileUpload implements a smart file chunk logic where multiple files can fit into a single upload request thus minimizing the client-server requests. With the smart file chunk logic, UXFileUpload allows you to upload very large files without have to worry about the performance and memory consumption in both client and server side. It is not necessary to change the maximum upload request length or other configuration in the server-side to accomodate the large files upload using the UXFileUpload control.
By default, UXFileUpload sent 128000 bytes to server in a single upload request. You can change this value by specifying the BufferSize property. The larger buffer size consumes more memory in the client, although it may improves the data transfer performance.
UXFileUpload includes a unique feature not available in other solutions, such as the ability to run multiple upload workers simultaneously. In traditional upload control, there can be only one upload worker in a single upload session. This means that if you have 10 files to upload, the single upload worker should complete the first file upload before it can process the second file, and so on.
By default, UXFileUpload runs on a single upload worker. You can increase the upload workers by setting the MaxSimultaneousUploads property. As a general guideline, you should limit the maximum upload workers to a range between 3 and 5.
When using multiple worker processes, the upload naturally completes much faster since the second worker process can process the remaining file while the first worker is uploading another file.
The following example shows how to set the upload control to use three simultaneous upload workers.
| XAML |
Copy Code
|
|---|---|
<Intersoft:UXFileUpload ServiceUrl="http://localhost:1825/UXFileUploadHandler.ashx" TargetFolder="~/Upload" MaxSimultaneousUploads="3"> </Intersoft:UXFileUpload> |
|
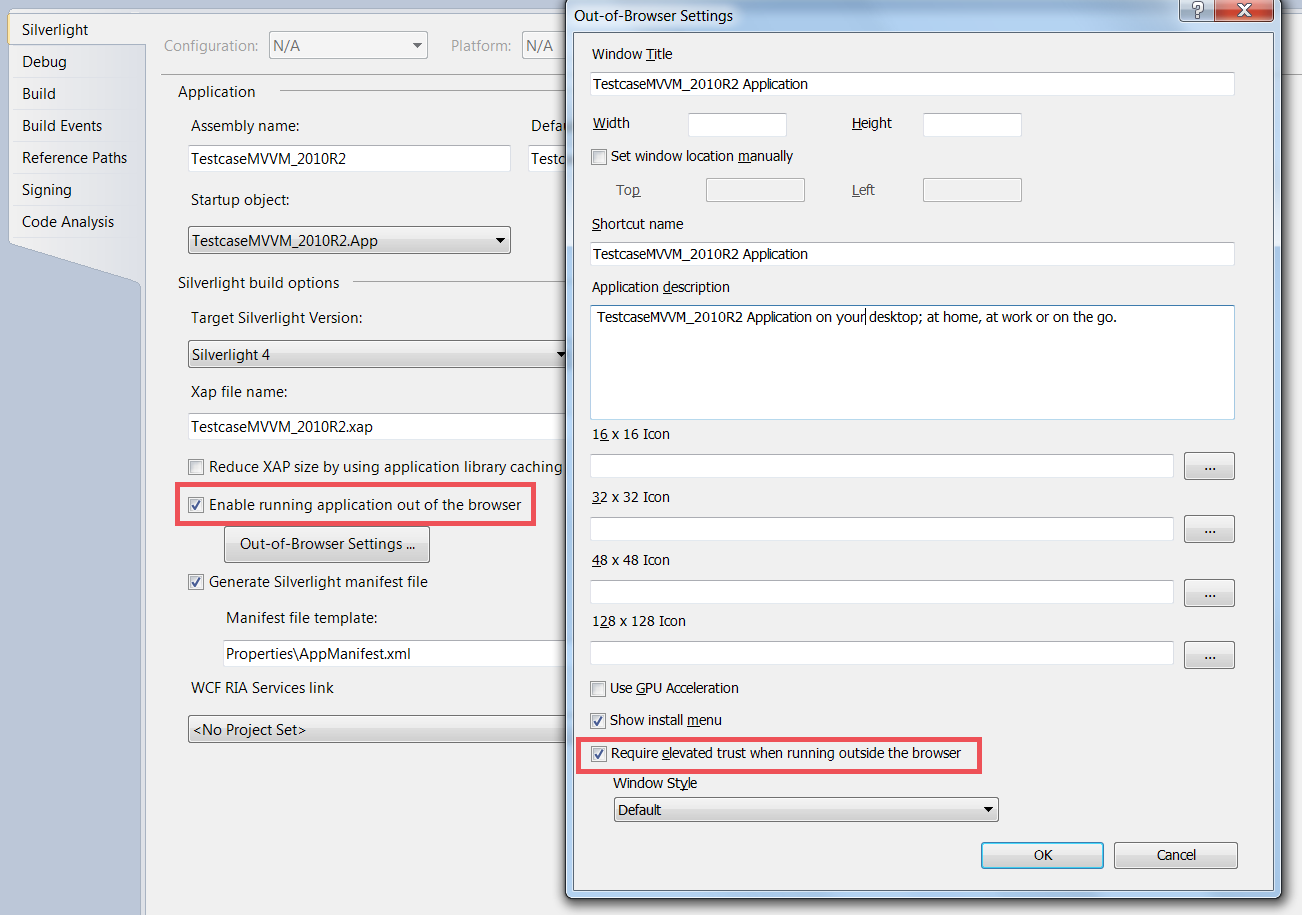
UXFileUpload runs consistently on both in-browser and out-of-browser Silverlight application, as well as WPF application. UXFileUpload has a special feature that allows users to drop one or more folders to add the files within the folder. This feature works only in out-of-browser Silverlight application and requires elevated trust to receive full trust permission. This feature is supported in WPF desktop application without additional configuration.
The following illustration describes the settings for out-of-browser and elevated trust to support folder drop.
