
| Intersoft ClientUI 8 > ClientUI Fundamentals > Navigation Overview > Navigation Walkthroughs > Walkthrough: Enable Authentication and Role-based Security to a Page using WCF Authentication Service |
This walkthrough shows how to create navigation new page and new button and enable authentication and role-based security to the page.
In this walkthrough, you perform the following tasks:
You need the following components to complete this walkthrough:
The first step is to create a new ClientUI MVVM Business Application project using Intersoft ClientUI MVVM Business Application project template in Visual Studio.
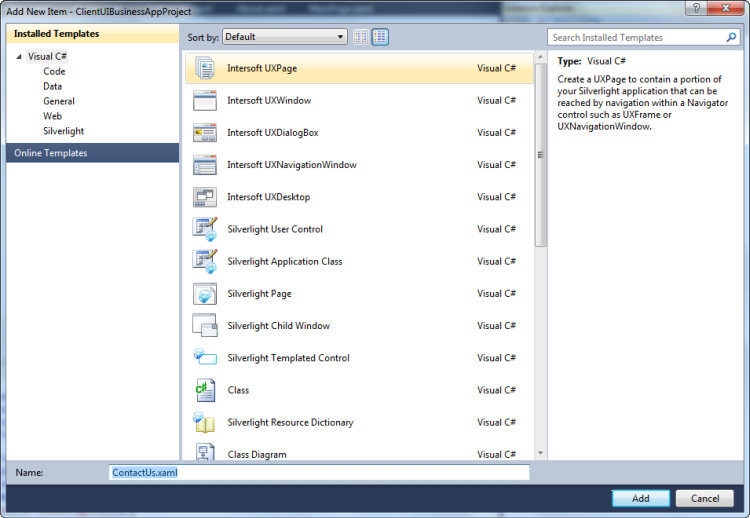
Next, you will add a new page to your project.
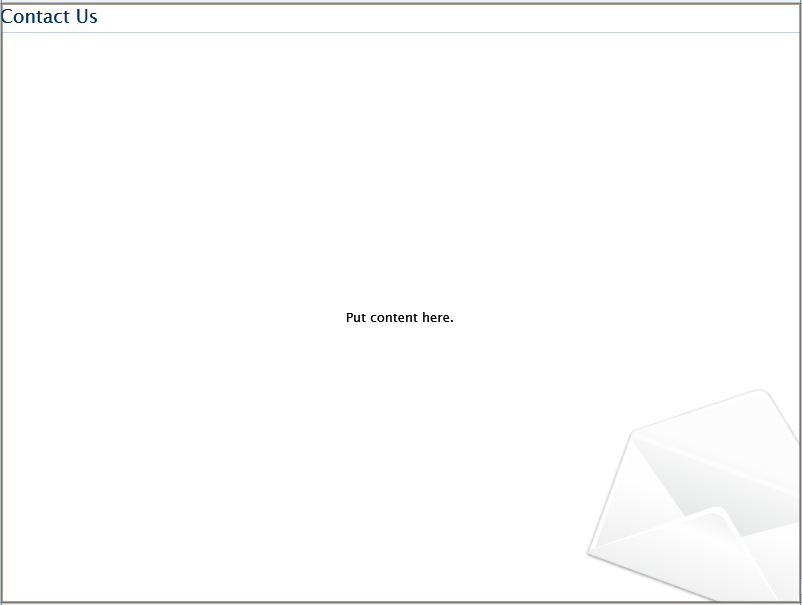
This section steps you through the process of creating ContactUs page that uses several ClientUI controls such as DockPanel and StylishLabel.

| XAML |
Copy Code
|
|---|---|
<Intersoft:UXPage xmlns="http://schemas.microsoft.com/winfx/2006/xaml/presentation" xmlns:x="http://schemas.microsoft.com/winfx/2006/xaml" xmlns:d="http://schemas.microsoft.com/expression/blend/2008" xmlns:mc="http://schemas.openxmlformats.org/markup-compatibility/2006" mc:Ignorable="d" xmlns:Intersoft="http://intersoft.clientui.com/schemas" x:Class="ClientUIBusinessAppProject.Views.ContactUs" Title="ContactUs Page" d:DesignWidth="800" d:DesignHeight="600" Style="{StaticResource CommonPageStyle}"> <Grid x:Name="LayoutRoot"> </Grid> </Intersoft:UXPage> |
|
| XAML |
Copy Code
|
|---|---|
<Grid x:Name="LayoutRoot"> <Grid.Background> <ImageBrush AlignmentY="Bottom" AlignmentX="Right" Stretch="None" Opacity="0.5" ImageSource="../Assets/Images/ContactUsLarge.png"> <ImageBrush.Transform> <TranslateTransform X="40" Y="40"/> </ImageBrush.Transform> </ImageBrush> </Grid.Background> <Intersoft:DockPanel FillChildMode="Custom"> <Intersoft:StylishLabel Content="Contact Us" Intersoft:DockPanel.Dock="Top" Style="{StaticResource PageHeaderStyle}" /> <Grid Intersoft:DockPanel.IsFillElement="True"> <TextBlock TextWrapping="Wrap" Width="280" VerticalAlignment="Center" HorizontalAlignment="Center" TextAlignment="Center" Text="Put content here."> </TextBlock> </Grid> </Intersoft:DockPanel> </Grid> |
|

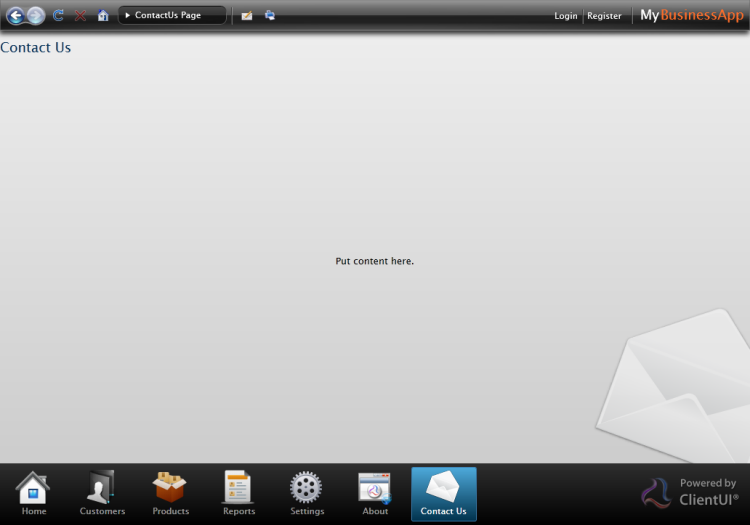
Next, you will create the UXNavigationButton that navigate to this page.
This section shows how to create ContactUs button using UXNavigationButton. This ContactUs button is used as navigation button to the ContactUs page. The navigation page is set through the NavigateUri property.
| XAML |
Copy Code
|
|---|---|
<Intersoft:UXItemsControl x:Name="NavigationItemsContainer" ItemContainerStyle="{StaticResource NavigationButtonStyle}" Orientation="Horizontal" Background="{StaticResource NavigationContainerBackground}"> <Intersoft:UXNavigationButton x:Name="btnHome" Content="Home" NavigateUri="/Home" Icon="Assets/Images/Home.png" IsDefaultNavigationSource="True"/> <Intersoft:UXNavigationButton Content="Customers" NavigateUri="/Customers" Icon="Assets/Images/CustomersFolder.png"/> <Intersoft:UXNavigationButton Content="Products" NavigateUri="/Products" Icon="Assets/Images/Products.png"/> <Intersoft:UXNavigationButton Content="Reports" NavigateUri="/Reports" Icon="Assets/Images/Reports.png"/> <Intersoft:UXNavigationButton Content="Settings" NavigateUri="/Settings" Icon="Assets/Images/Settings.png"/> <Intersoft:UXNavigationButton Content="About" NavigateUri="/About" Icon="Assets/Images/ClientUI_Silverlight.png"/> <Intersoft:UXNavigationButton Content="Contact Us" NavigateUri="/ContactUs" Icon="Assets/Images/ContactUs.png"/> </Intersoft:UXItemsControl> |
|


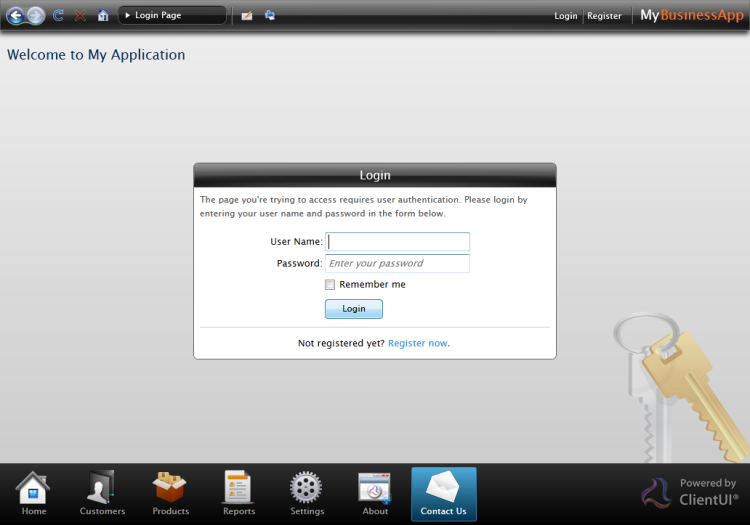
This section shows how to enable page authentication.
| XAML |
Copy Code
|
|---|---|
<Intersoft:UXPage xmlns="http://schemas.microsoft.com/winfx/2006/xaml/presentation" xmlns:x="http://schemas.microsoft.com/winfx/2006/xaml" xmlns:d="http://schemas.microsoft.com/expression/blend/2008" xmlns:mc="http://schemas.openxmlformats.org/markup-compatibility/2006" mc:Ignorable="d" xmlns:Intersoft="http://intersoft.clientui.com/schemas" x:Class="ClientUIBusinessAppProject.Views.ContactUs" Title="ContactUs Page" d:DesignWidth="800" d:DesignHeight="600" Style="{StaticResource CommonPageStyle}" RequiresAuthentication="True"> |
|

This section lists the complete code used in this walkthrough.
| XAML |
Copy Code
|
|---|---|
<Intersoft:UXPage xmlns="http://schemas.microsoft.com/winfx/2006/xaml/presentation" xmlns:x="http://schemas.microsoft.com/winfx/2006/xaml" xmlns:d="http://schemas.microsoft.com/expression/blend/2008" xmlns:mc="http://schemas.openxmlformats.org/markup-compatibility/2006" mc:Ignorable="d" xmlns:Intersoft="http://intersoft.clientui.com/schemas" x:Class="ClientUIBusinessAppProject.Views.ContactUs" Title="ContactUs Page" d:DesignWidth="800" d:DesignHeight="600" Style="{StaticResource CommonPageStyle}" RequiresAuthentication="True"> <Grid x:Name="LayoutRoot"> <Grid.Background> <ImageBrush AlignmentY="Bottom" AlignmentX="Right" Stretch="None" Opacity="0.5" ImageSource="../Assets/Images/ContactUsLarge.png"> <ImageBrush.Transform> <TranslateTransform X="40" Y="40"/> </ImageBrush.Transform> </ImageBrush> </Grid.Background> <Intersoft:DockPanel FillChildMode="Custom"> <Intersoft:StylishLabel Content="Contact Us" Intersoft:DockPanel.Dock="Top" Style="{StaticResource PageHeaderStyle}" /> <Grid Intersoft:DockPanel.IsFillElement="True"> <TextBlock TextWrapping="Wrap" Width="280" VerticalAlignment="Center" HorizontalAlignment="Center" TextAlignment="Center" Text="Put content here."> </TextBlock> </Grid> </Intersoft:DockPanel> </Grid> </Intersoft:UXPage> |
|