
| Intersoft.Client.UI.ScheduleView Namespace > UXScheduleView Class : CanUserAddItems Property |
<CategoryAttribute("Common Properties")>
Public Property CanUserAddItems As Boolean
Dim instance As UXScheduleView
Dim value As Boolean

instance.CanUserAddItems = value

value = instance.CanUserAddItems
[CategoryAttribute("Common Properties")]
public bool CanUserAddItems {get; set;}
[CategoryAttribute("Common Properties")]
public:
property bool CanUserAddItems {
   bool get();
   void set (    bool value);
}
Data editing in UXScheduleView involves three fundamental processes, Create, Update and Delete (CUD). You can enable each editing feature by setting the property CanUserAddItems, CanUserDeleteItems, CanUserEditItems, CanUserMoveItems, CanUserResizeItems.
| Enable Editing |
Copy Code
|
|---|---|
<Intersoft:UXScheduleView DisplayDate="1/2/2012" EventsSource="{Binding Events}" CategoriesSource="{Binding Categories}" ResourcesSource="{Binding Resources}" CanUserAddItems="True" CanUserDeleteItems="True" CanUserEditItems="True" CanUserMoveItems="True" CanUserResizeItems="True"> <Intersoft:UXScheduleDayView/> <Intersoft:UXScheduleWorkWeekView/> <Intersoft:UXScheduleWeekView IsActive="True"/> <Intersoft:UXScheduleMonthView/> </Intersoft:UXScheduleView> |
|
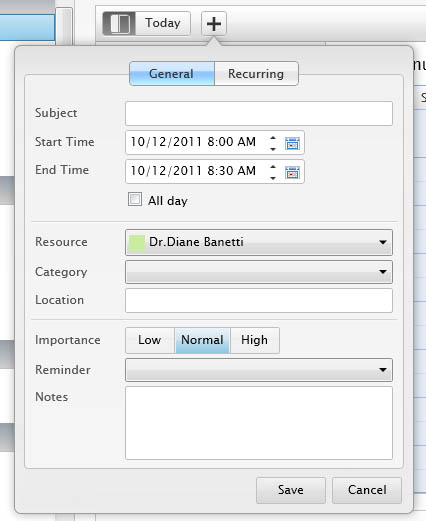
When the CanUserAddItems property is set to true, you will see the Add button in the header area of UXScheduleView. When clicked, a fluid call out that has built-in editing form will appear such as shown in the figure below.

 |
If you prefer to use a custom Add Button, you need to set the AddButtonElement to the desired Add Button element. This allows the editing form's call out to point correctly to your custom Add Button element. |
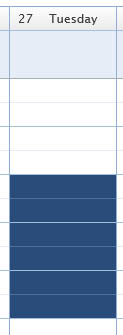
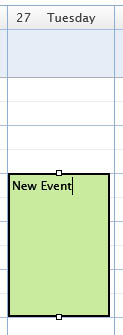
Depending on the value of InsertKeyMode property, you can select a single cell or multiple cells and directly type in any characters to insert a new event for that particular date range.


The InsertKeyMode has the following value:
When inserting an event using inline editing feature, the event will not be saved until you press the Enter key or focus to another element. To cancel the insertion, simple press Escape key using keyboard. When you press Escape key to cancel the insertion, the control will automatically reselect previously selected cells.
 |
When inserting a new event using inline editing, it requires a predetermined ResourceID that you can customize in PrepareNewItemCommand. Please see Handling the Create, Update and Delete operation for detailed information. |
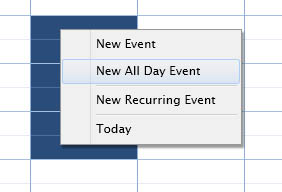
All schedule view controls provide a built-in context menu allowing users to easily add a new event by right clicking on the selected cells.

Notice that you have several insertion options that you can choose, whether you want to create an event or recurring event from the selected date range, or a new all-day event.
When you inserted an item that overlapped with other events in UXScheduleMonthView, it will try to insert the item in the available space which follow the rendering logic of the events. In the case that it cannot be placed in the available space, it will be placed at the bottom of the event cell until the insertion is committed such as shown in the following figure.

Target Platforms: Windows 7, Windows Vista SP1 or later, Windows XP SP3, Windows Server 2008 (Server Core not supported), Windows Server 2008 R2 (Server Core supported with SP1 or later), Windows Server 2003 SP2