This walkthrough will guide you to enable the paging feature in WebGrid, which is a crucial feature to deliver high performance data presentation to user.
During this walkthrough, you will learn how to do the following:
- Configure the LINQ to SQL classes.
 Prerequisites
In order to complete this walkthrough, you will need the following:
- Visual Studio 2008 Application.
- Microsoft.NET Framework 3.5.
- Intersoft WebUI Studio.NET 2008 R2.
Step-By-Step Instructions
To create new web application and enable paging feature
- To better demonstrate paging feature, let's use a larger datasource such as Orders table. Repeat the same steps as in Walkthrough: Binding WebGrid to ISLinqDataSource, except step 6 where you should choose Orders table instead of Customers.

After the Orders structure is retrieved, switch to Source view, and delete "Customer" column from the WebGrid's columns collection. The customer column is the association between order and its parent object, and is not required to be shown in WebGrid. - Expand LayoutSettings.
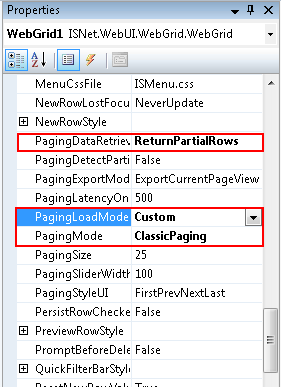
- Set the following properties. Note: It's important to set these 3 properties to instruct WebGrid to take advantage of LINQ to SQL features through the connected LINQ-enabled datasource.
- PagingMode to ClassicPaging.
- PagingLoadMode to Custom.
- PagingRetrievalMode to ReturnPartialRows.
See the following image for the details.
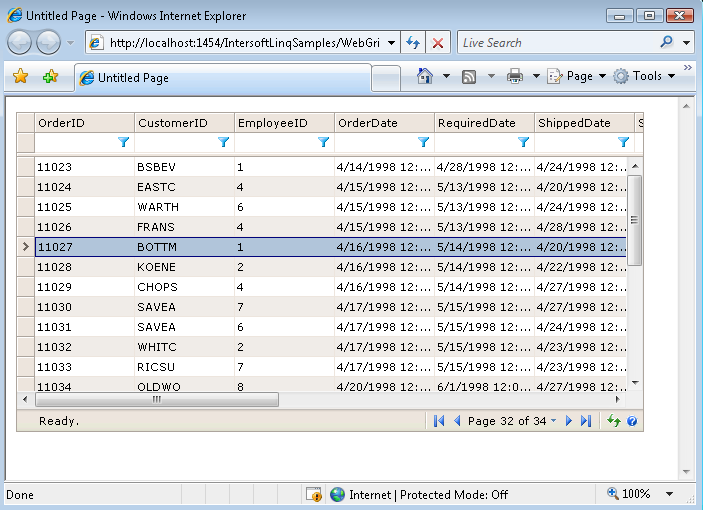
- You're all set. Save the WebForm and run it to browser.
- Try to go to last page, and notice the performance difference. The paging now took less than a second to perform. You can also try with combination of data operations such as filtering and sorting.