
| Intersoft ClientUI 8 > ClientUI Application Development > Working with ClientUI Controls in Expression Blend Designer > Walkthrough: Style a Window in Blend Designer |
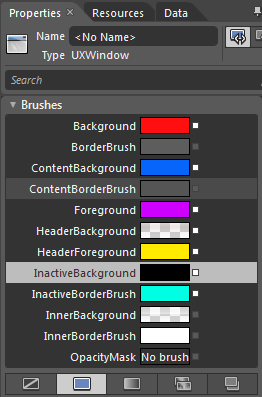
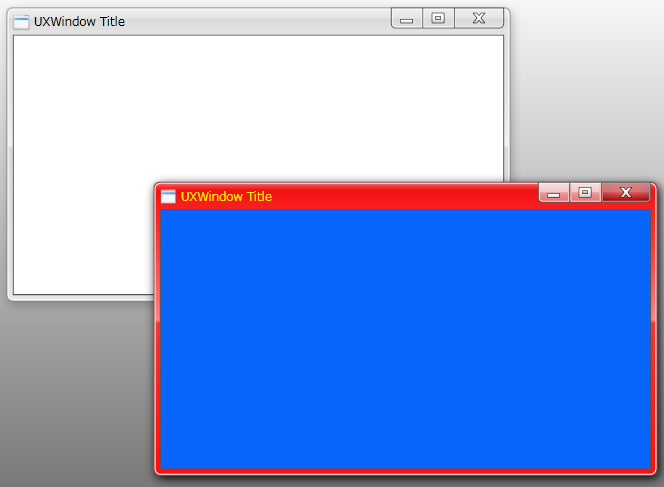
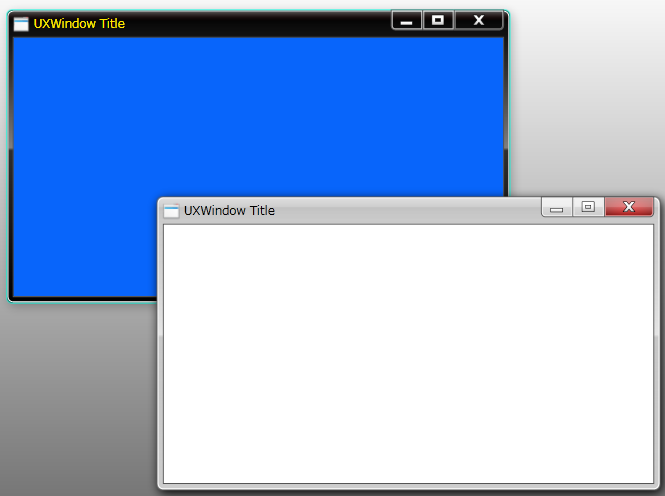
Intersoft ClientUI includes rich controls that can be easily styled through brushes properties, although more advanced customization such as control and template editing are supported as well. This walkthrough shows how to change the style of UXWindow by using the designer tools available in Expression Blend.
In this walkthrough, you perform the following tasks:
Create a new Silverlight project.
Style a window using Blend designer.
You need the following components to complete this walkthrough:
Microsoft Expression Blend 4
The first step is to create a new Silverlight Application and Website project in Microsoft Expression Blend 4.
Start Microsoft Expression Blend 4.
Create a new Silverlight project using the Silverlight Application + Website project template. Name the project as AddMenuItemAndSeparatorToMenuBarInBlendDesigner.


In this walkthrough, you have learned how to style a UXWindow using Microsoft Expression Blend. To learn more about more advanced customization such as control template editing, see Styles and Templates Overview.
| XAML |
Copy Code
|
|---|---|
<UserControl xmlns="http://schemas.microsoft.com/winfx/2006/xaml/presentation" xmlns:x="http://schemas.microsoft.com/winfx/2006/xaml" xmlns:Intersoft="http://intersoft.clientui.com/schemas" xmlns:d="http://schemas.microsoft.com/expression/blend/2008" xmlns:mc="http://schemas.openxmlformats.org/markup-compatibility/2006" mc:Ignorable="d" x:Class="StyleaWindow.MainPage" Width="640" Height="480"> <Grid x:Name="LayoutRoot" Background="White"> <Intersoft:UXDesktop Height="480" Width="640"> <Intersoft:UXWindow Header="UXWindow Title"> <Grid/> </Intersoft:UXWindow> <Intersoft:UXWindow Header="UXWindow Title" Background="#FFFF0F0F" ContentBackground="#FF0865FB" HeaderForeground="#FFFFEA00" Foreground="#FFCE00FF" InactiveBorderBrush="#FF00FFE2" InactiveBackground="Black" IsClientVisible="True" d:LayoutOverrides="Width, Height"> <Intersoft:UXWindow.HeaderBackground> <LinearGradientBrush EndPoint="0,24" MappingMode="Absolute" StartPoint="0,0"> <GradientStop Color="#59FFFFFF" Offset="0"/> <GradientStop Color="#003D3D3D" Offset="1"/> <GradientStop Color="#0C000000" Offset="0.35"/> <GradientStop Color="#0C5E0000" Offset="0.34"/> </LinearGradientBrush> </Intersoft:UXWindow.HeaderBackground> <Grid/> </Intersoft:UXWindow> </Intersoft:UXDesktop> </Grid> </UserControl> |
|