This walkthrough shows you how to create updatable WebGrid using ObjectDataSource in BatchUpdate mode (Insert Identity / AutoIncrement ID Scenario).
During this walkthrough, you will learn how to do the following:
- Create Dataset
- Use SmartTag to set DataSource
 Prerequisites
In order to complete this walkthrough, you will need the following:
- Access to the Microsoft Access Northwind database.
- Visual Studio 2008 Application.
 Step-By-Step Instructions
To create new web application and bind WebGrid to ObjectDataSource
- Launch Visual Studio.NET 2008.
- Click on File menu, then select New and click Web Site.
- Select ASP.NET Web Site in the Template box and set Location to HTTP.
- Named the Web Site and click OK.
- Right-click on Project's name and select Add New Item.
- Select Intersoft AppForm in the My Templates box and named it as Walkthrough.aspx.
- Drag WebGrid instance from ToolBar to WebForm.
- In the Solution Explorer, right-click on App_Data and select Add Existing Item.
- Browse and add NorthWind.mdb in C:\Program Files\Intersoft Solutions\Data (Default installation folder).
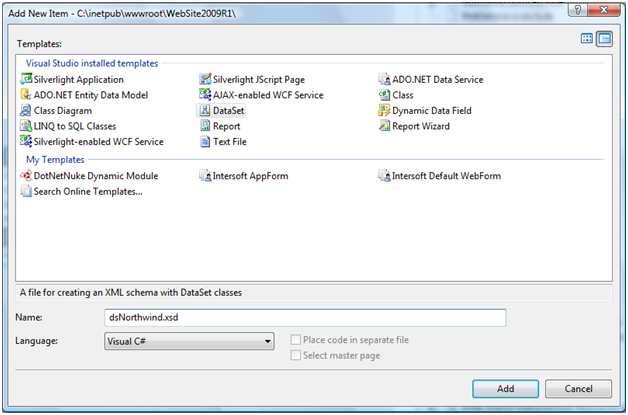
- Create DataSet (dsNorthWind) in App_code and go to Server explorer.
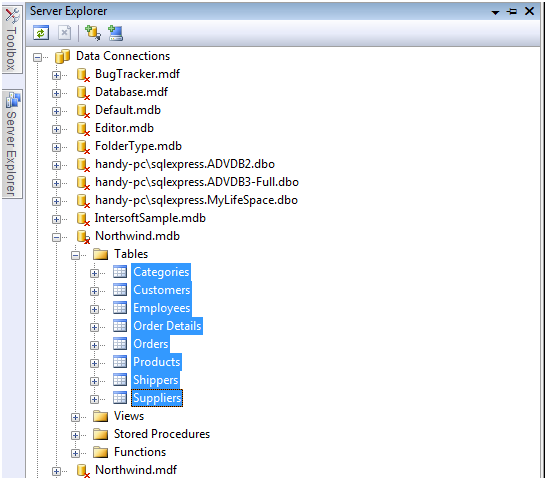
- Choose Northwind and drag and drops all tables into dataset.
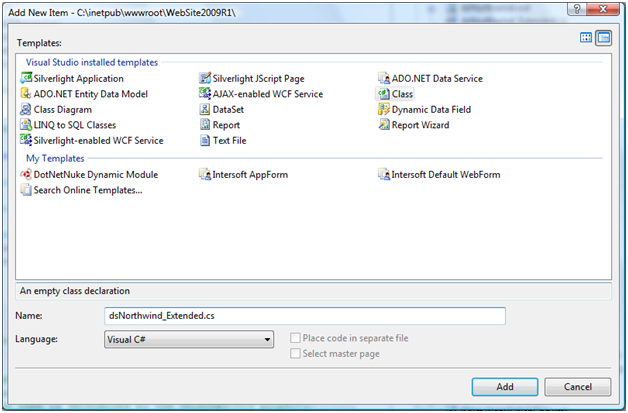
- Create a new class object (dsNorthwind_Extended.cs) in App_code.
- Refer the namespace to dsNorthwindTableAdapters and add methods to select identity. Here are the following details.
C#  Copy Code
using System.Data.OleDb;namespace dsNorthwindTableAdapters
{
   public partial class OrdersTableAdapter : System.ComponentModel.Component
   {
   [System.ComponentModel.DataObjectMethodAttribute(System.ComponentModel.DataObjectMethodType.Insert, true)]
      public int DoInsert(ref System.Nullable OrderID, string CustomerID, System.Nullable EmployeeID,
      System.Nullable OrderDate, System.Nullable RequiredDate, System.Nullable
      ShippedDate, System.Nullable ShipVia, System.Nullable Freight, string ShipName, string ShipAddress, string ShipCity,
      string ShipRegion, string ShipPostalCode, string ShipCountry)
      {
         this.Connection.Open(); // important
         int affectedRows = this.Insert(CustomerID, EmployeeID, OrderDate, RequiredDate, ShippedDate, ShipVia, Freight,
               ShipName, ShipAddress, ShipCity, ShipRegion, ShipPostalCode, ShipCountry);
         int identity = this.SelectIdentityQuery();
         OrderID = identity;
         this.Connection.Close();
         return affectedRows;
      }

      public int SelectIdentityQuery()
      {
         OleDbCommand cmd = new OleDbCommand("SELECT @@IDENTITY", this.Connection);
         int newID = (int)cmd.ExecuteScalar();
         return newID;
      }
   }
}
- Click the SmartTag on the upper right of the WebGrid.
- In Choose Data Source field, choose <New data source...>.
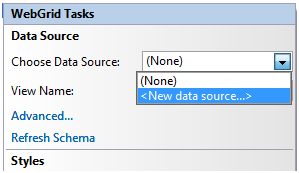
- In Data Source Configuration Wizard, choose Object and click OK.
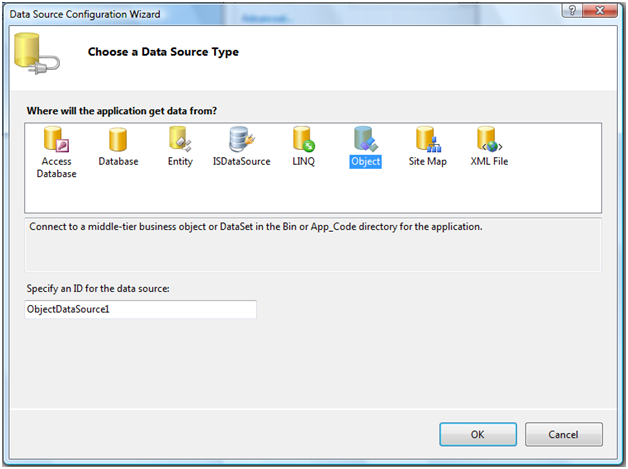
- Select your Business Object and click Next.
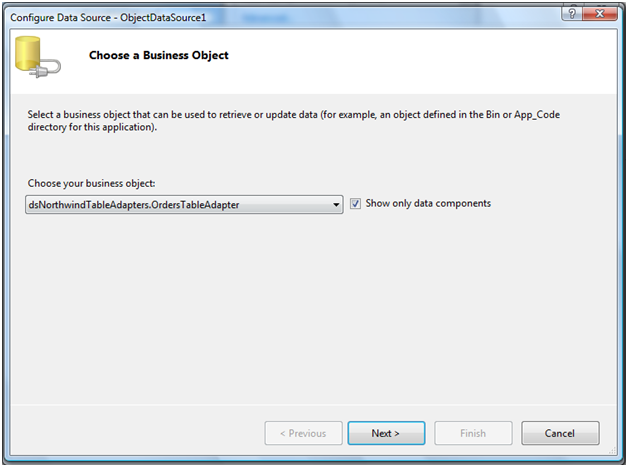
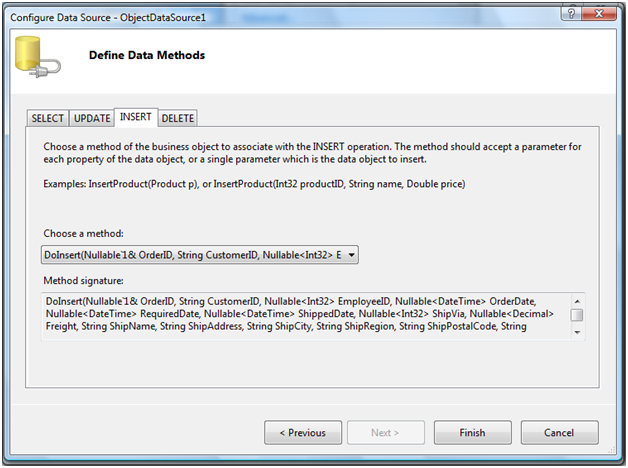
- Click Next and go to Insert Method. Ensure that the method is referring to the Insert method for identity which created at dsNorthwind_extended and click Finish.
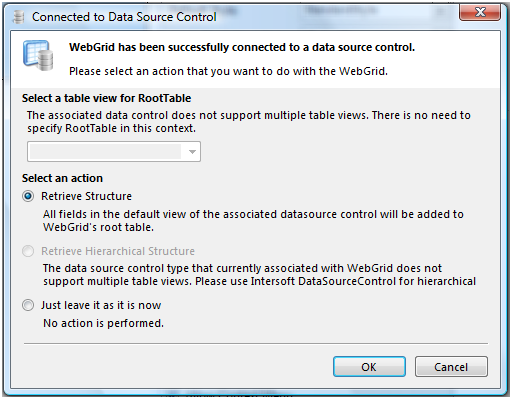
- Finally, choose Retrieve Structure action in Connected to Data Source Control Wizard and click OK.
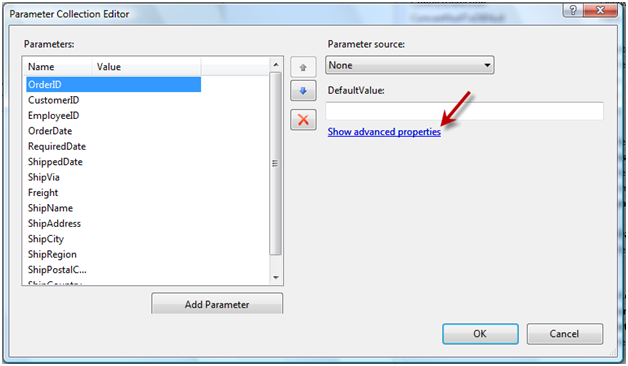
- Select ObjectDataSource control at design mode and press F4. Click on InsertParamerters Collection.

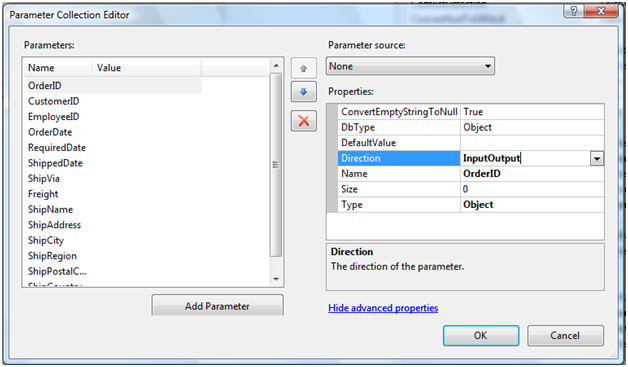
- Select OrderID and click on Show Advanced Properties.
- Ensure that Direction properties is assigned to InputOutput and OK.
- Click on ObjectDataSource control at design mode and press F4 (server side event mode).
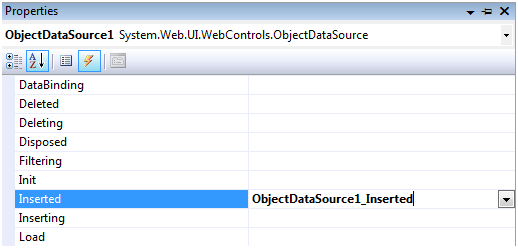
- At Server-side, add the following code:
-
C#  Copy Code
protected void ObjectDataSource1_Inserted(object sender, ObjectDataSourceStatusEventArgs e)
{
   WebGrid1.SetOutputParameters(e.OutputParameters);
}
Tasks
Walkthrough: Creating Updatable WebGrid using DataTable
Walkthrough: Creating Updatable Hierarchical WebGrid using DataSet
Walkthrough: Creating Updatable Hierarchical WebGrid using ISDataSource
Walkthrough: Creating Updatable WebGrid using Custom Object
Other Resources
Walkthrough Topics
How-to Topics


