This walkthrough will guide you to bind the WebCombo control to ISLinqDataSource.
During this walkthrough, you will learn how to do the following:
- Configure the LINQ to SQL classes.
 Prerequisites
In order to complete this walkthrough, you will need the following:
- Visual Studio 2008/2010 Application.
- Microsoft.NET Framework 3.5.
 Step-By-Step Instructions
To create new web application and bind WebCombo to ISLinqDataSource
- Open Visual Studio toolbox. Drag WebCombo to your WebForm's designer surface.
- Drag LinqDataSource to the designer surface.
- Click Configure Datasource from the LinqDataSource smart tag.
- The LinqDataSource Wizard is pretty simple and straightforward. On the first screen, it should already select NorthwindDataContext by default, so simply click Next.
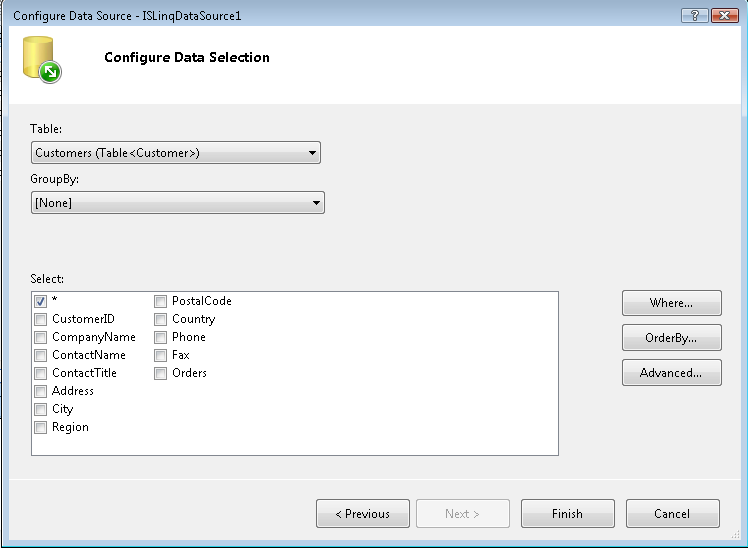
- On the second screen, since we want to select all customer properties, we don't need to configure anything else, simply click Finish. See below.

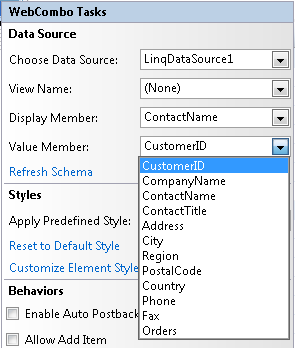
- Select WebCombo instance and open its smart tag. Choose LinqDataSource1 as the DataSourceID, set DataTextField to ContactName, and DataValueField to CustomerID. You can click on the dropdown to pick a field from the list. See below.

- You're all set. Save your WebForm, and run in browser.
- Try to type something into the textbox to search, or click on the dropdown arrow. The result should be similar to the following image.

With LINQ to SQL (through LinqDataSource), WebCombo executes the query and returns it to the client in a fraction of second - no matter how large the datasource is.


