This walkthrough shows you how to create a new project using avaiable Intersoft ClientUI Silverlight project template, configure the project to enable multiple cultures, and add resource files that you can consume in Silverlight XAML pages.
In this walkthrough, you perform the following tasks:
- Create a new Silverlight ClientUI project using Intersoft ClientUI project template.
- Configure the project to enable multiple cultures.
- Add localized resource files.
Prerequisites
You need the following components to complete this walkthrough:
- Visual Studio 2010
- Silverlight 4 Tools for Visual Studio 2010
- Intersoft ClientUI
Creating a Silverlight Intersoft ClientUI Project
This section describes how to create new Intersoft ClientUI project in Visual Studio using the available Intersoft ClientUI project template. This walkthrough is using Visual C# template. However, ClientUI also provides the project templates in Visual Basic.
To create a Silverlight Intersoft ClientUI project
- Start Visual Studio 2010.
- On the File menu, click New and then Project.
- The New Project dialog box appears.
- In the Installed Templates pane, expand the Visual C# node and select Silverlight.
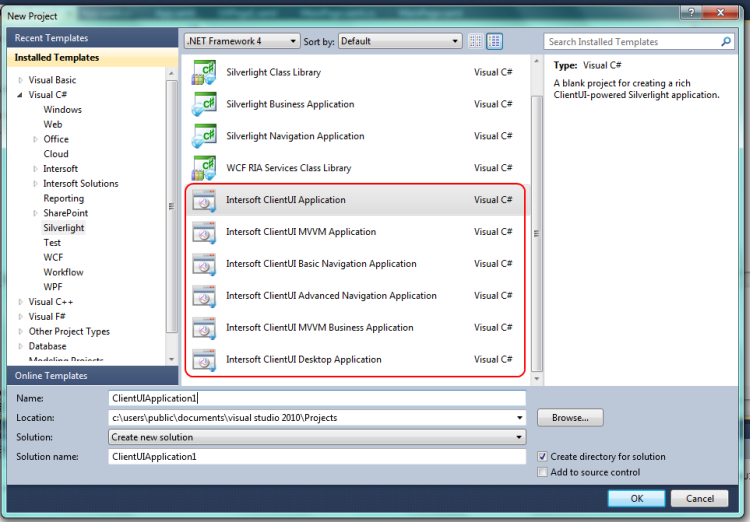
- Select the ClientUI template you wish to use in your project.
- Specify a Name and a Location for the application and then click OK.
Configuring Silverlight Project for Multiple Cultures
Silverlight project, by default, supports only neutral culture in Visual Studio 2010. Since Visual Studio has not supported the user interface to enable multiple cultures in a Silverlight project, you need to edit the project file manually outside Visual Studio such as explained in the following walkthrough.
To configure Silverlight project file manually
- Close the Silverlight project and optionally exit Visual Studio.
- Open Windows Explorer and locate the ClientUIApplication1.csproj in the folder where it was previously created.
- Edit the ClientUIApplication1.csproj using a text editing application such as Notepad.
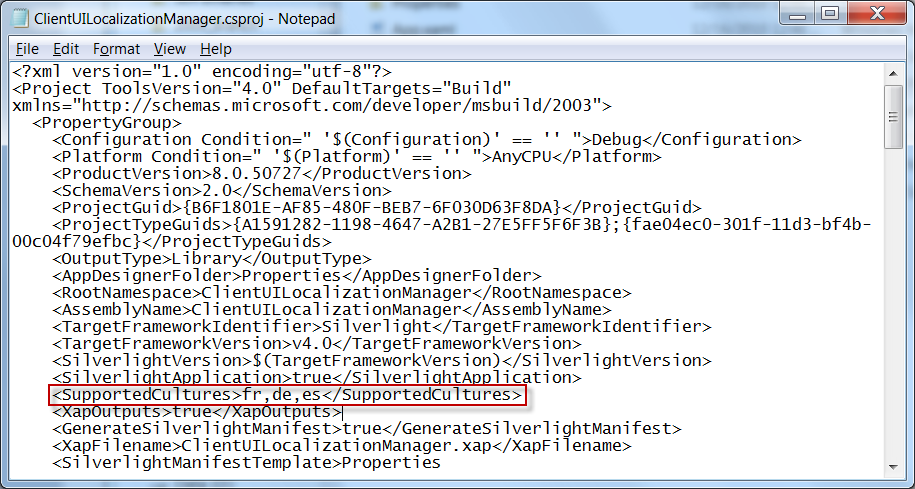
- Add SupportedCultures node under the PropertyGroup node and specify the desired cultures as the value of the node, such as shown in the following code.
| ClientUIApplication1.csproj |
Copy Code
|
<SupportedCultures>fr,de,es</SupportedCultures> |
The results look like the following illustration.
- Save the changes.
- Start Visual Studio and open the Silverlight project.
 |
To learn more about the culture format, resource concept and the localization best practice, see the Silverlight Localization topic in MSDN Library. |
Adding Localized Resource Files
The final step is to add the resource file to your Silverlight project which contains the strings that you would like to localize. This walkthrough shows how to add the default resource file with code generation, then followed with the resource files for other cultures.
To add a default resources file
- Create a new folder named Localization in the root folder of your Silverlight project.
- Right click on the newly created folder and choose the New Item command from the Add menu in the context menu.
- Locate and select the Resources File from the Installed Templates list such as shown in the following illustration:
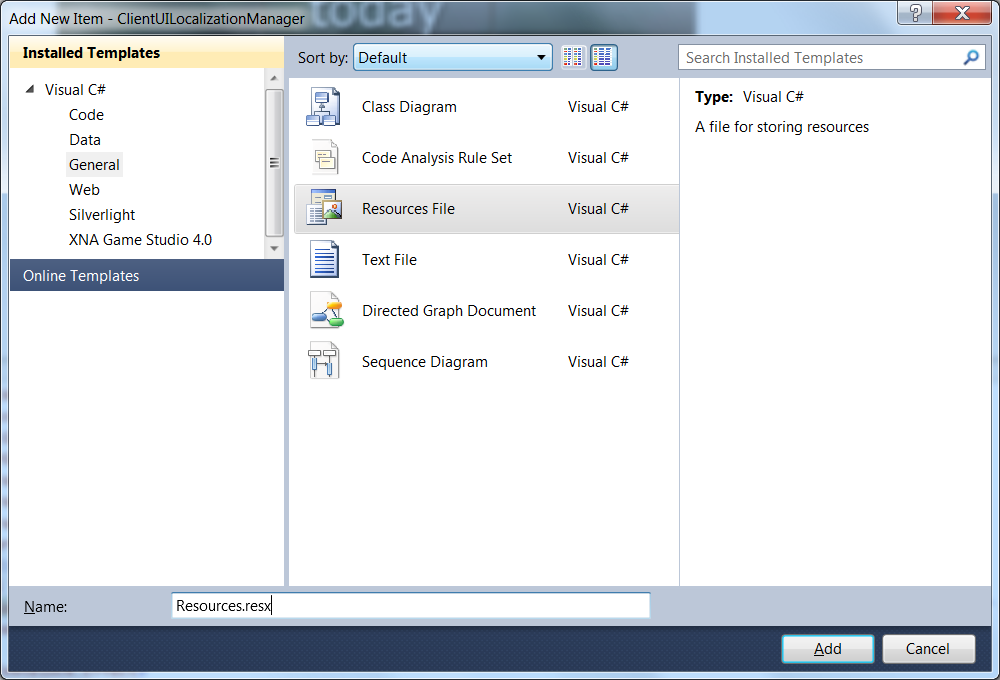
- Name it Resources.resx for the default resources file.
- Open the Resources.resx file in Visual Studio.
- Change the Access Modifer option to Public (the default is Internal). This step is required to allow data binding to the resource entries. See the following illustration.
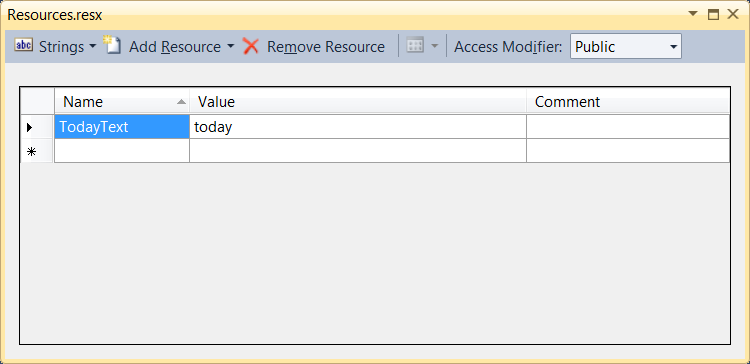
- You can now add the strings that you would like to localize. For example, add a string with the name set to TodayText and the value set to today.
To add additional resources file for other cultures
- In the Localization folder, add a new Resources file similar to the steps in the previous section.
- To add a new resources file for France culture, you add the .fr after the file name which indicate the culture for the France resource, for instance, Resources.fr.resx. Silverlight automatically recognizes the resources file for the culture at compile time.
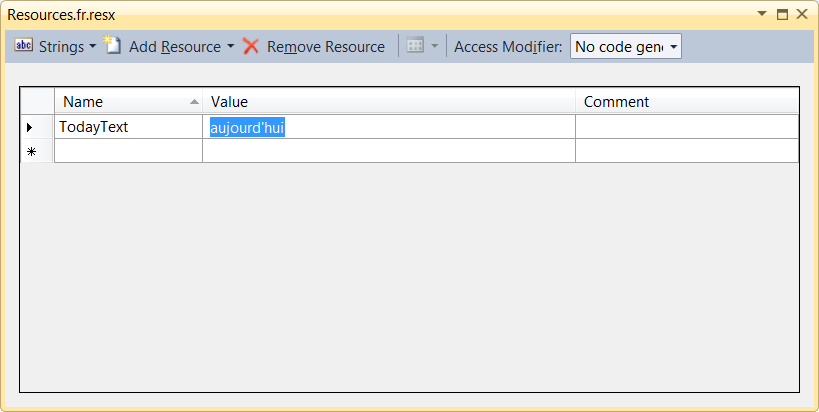
- Make sure that Access Modifier option is set to No Code Generation.
- Add the strings that you would like to localize. The name of the string should be consistent with the name you used in default resource, for instance, to localize the TodayText in France culture, you add a new entry for TodayText and set its value to aujourd'hui. See the following illustration.
- Repeat the above steps to add resources for other cultures as you desire.
See Also


