


This walkthrough shows you how to set Checkbox as WebGridColumn's EditType.
During this walkthrough, you will learn how to do the following :
- Change the WebGridColumn's EditType to Checkbox using designer.
 Prerequisites
In order to complete this walkthrough, you will need the following:
- Access to the Microsoft Access Northwind database.
- Visual Studio 2005 Application.
Step-By-Step Instructions
To create new web application and set Discontinued column EditType, ColumnType to Checkbox.
- Bind WebGrid to AccessDataSource.
- Use Products table instead of Customers table.
- Set WebGrid's properties AllowEdit to true.
Using designer
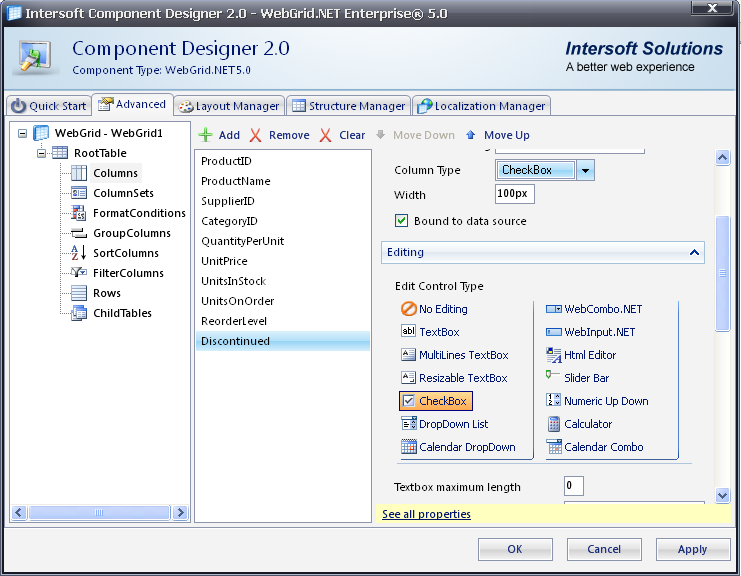
- Right click on WebGrid and click on WebGrid.Net Designer.
- Go to Advanced tab >> RootTable >> Columns.
- Changed ColumnType from TextBox to CheckBox.
- Change Text to Checkbox.
- Set focus to Discontinued's column and find Editing Expandable panel.
- Change TextBox to Checkbox.
- Click Apply >> OK.
- The picture will be like this:
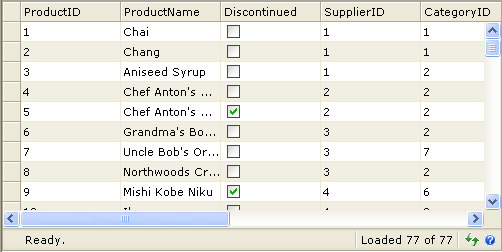
- Finally, compile and run the project. The WebForm will look like the following snapshot:
 See Also
Tasks
Walkthrough: Using MultiLine TextBox
Walkthrough: Using Calendar DropDown
Walkthrough: Using Calendar Combo
How-to: Perform Bulk Update on a Button Click event
How-to: Use DropDownList as EditType of a WebGridColumn
References
ColumnType Property
EditType Property
Other Resources
Walkthrough Topics
How-to Topics