In some scenarios, multiple column types for different purpose are required to achieve better user-experience.
During this walkthrough, you will learn how to do the following:
- Create columns which are most suited its objective using our rich ColumnType and EditType.
- Use JavaScript to show alert.
 Prerequisites
In order to complete this walkthrough, you will need the following:
- Visual Studio 2005 Application.
 Step-By-Step Instructions
To create columns using our rich ColumnType and EditType
- Binding WebGrid to Hierarchical ISDataSource.
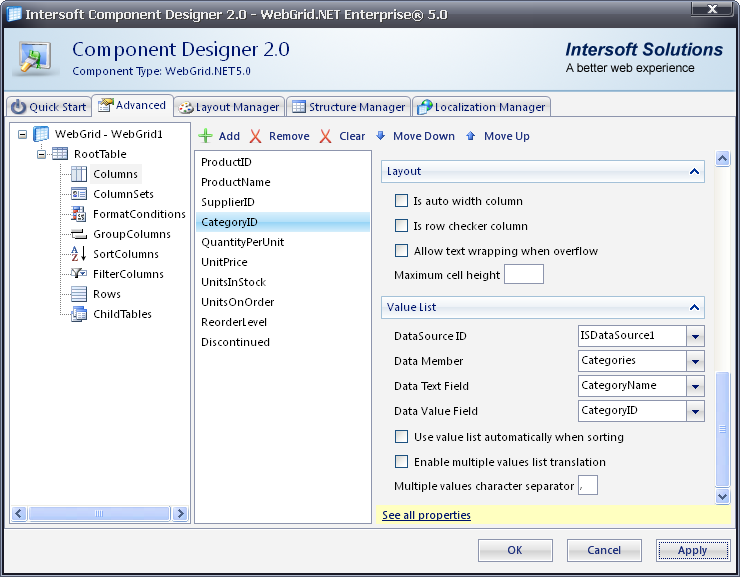
- Set the ValueList from column properties:

- Add this javaScript function which will later be used when the column colBtn is clicked.
JavaScript  Copy Code
<script language="javascript">
        function DoClick(ID)
        {
                alert("ProductID = " + ID);
                return true;
        }
</script>
- In the InitializeRow event of the grid, you put codes to set the value for column colCustom whose ColumnType is set to Custom , other than that you also add CustomObjectAttributes for column colBtn which when clicked will execute the javaScript function which has been declared above. You also set the HyperlinkFormatString property for column ProductID.
C#  Copy Code
private void WebGrid1_InitializeRow(object sender, ISNet.WebUI.WebGrid.RowEventArgs e)
{
        if(e.Row.Type == RowType.Record)
        {
                string productID = e.Row.Cells.GetNamedItem("ProductID").Text;
                string categoryID = e.Row.Cells.GetNamedItem("CategoryID").Text;
                string customText = "" + productID + " " + categoryID +"";

                // obtain the cells collection of the current row
                WebGridCellCollection cells = e.Row.Cells;

                // assigns custom text
                cells.GetNamedItem("colCustom").Text = customText;

                // prepare CustomObjectAttributes text
                // of button type column
                // by invoking DoClick() at the client side
                // along with the CustomerID
                string customObjectAttributes =
                        " onclick = \"DoClick(ProductID)\"" +
                        " ProductID = \"" + productID + "\"";

                // attach the CustomObjectAttributes to the button
                // type column
                cells.GetNamedItem("colBtn").CustomObjectAttributes =
                        customObjectAttributes;

                int discontinued = Convert.ToInt16(cells.GetNamedItem("Discontinued").Value);

                // the objective is to make button invisible
                // if the 'Customer' is from 'UK'

                if(discontinued == 1)
                {
                        // Configure the column type to be ordinary text
                        // instead of button type column
                        cells.GetNamedItem("colBtn").Column.ColumnType = ColumnType.Text;
                        cells.GetNamedItem("colBtn").Text = "Not Editable";
                }
                else
                {
                        cells.GetNamedItem("colBtn").Column.ColumnType = ColumnType.Button;
                        cells.GetNamedItem("colBtn").Column.ButtonText = "Get ProductID";
                }

                string hypFormatString = "NewPage.aspx?ProductID='" + e.Row.Cells.GetNamedItem("ProductID").Text + "'&&CategoryID='" +
                e.Row.Cells.GetNamedItem("CategoryID").Text + "'";
                e.Row.Cells.GetNamedItem("ProductID").Column.HyperlinkFormatString = hypFormatString;
                e.Row.Cells.GetNamedItem("ProductID").Column.HyperlinkTarget = HyperlinkTarget.Blank;
        }
}
Tasks
Walkthrough: Utilizing button ColumnType
Walkthrough: Using CheckBox column in Hierarchical WebGrid
Walkthrough: Deleting a record using WebGrid button
Walkthrough: Configuring password as ColumnType
Concepts
Column Types
References
InitializeRow Event
ColumnType Property
EditType Property
ValueList Property
Other Resources
Walkthrough Topics
How-to Topics


