Objectives
This tutorial demonstrates how to create a simple ExplorerPane using WebExplorerPane Designer. There are 3 modes for the content which are UseItems, UseInlineContent and UseIFrame.
- Drag WebExplorerPane from Toolbox into a WebForm page.

- Right-click on the WebExplorerPane and choose WebExplorerPane Designer.
- In the designer, choose Panes. Set ContentMode to UseItems, CaptionDisplayMode to
TextAndImage and set the Image URL.
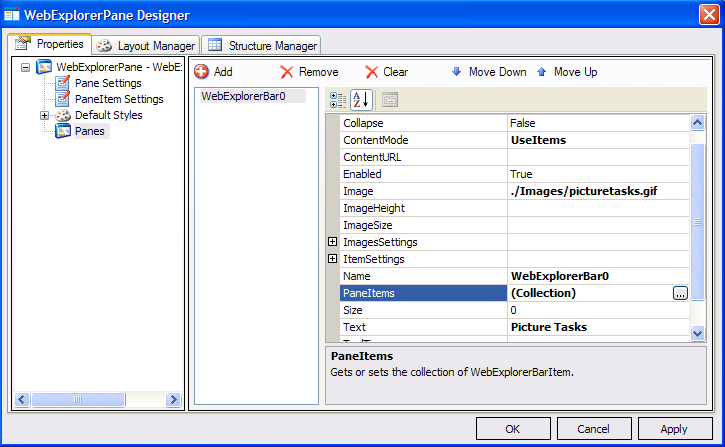
- Click PaneItems (collection) and the WebExplorerBarItem Collection Editor dialog appears.
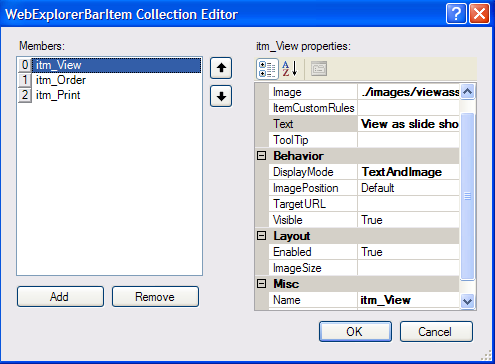
- Set the bar Items respectively like the following snapshot. Now, you have learned how to create an explorer bar with UseItems as the
ContentMode.
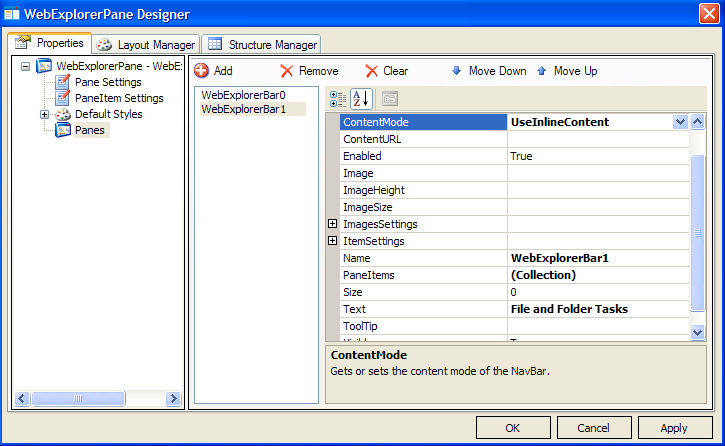
- Go back to WebExplorerPane Designer. Add a new WebExplorerBar and set ContentMode to UseInlineContent.
- In the HTML code, add the following code-snippet under ContentTemplate:
Script  Copy Code
<ISWebDesktop:WebExplorerBar ContentMode="UseInlineContent" name="WebExplorerBar1"
   text="File and Folder Tasks">
   <ContentTemplate>
        <table style="margin: 3px">
            <tr>
                <td>
                    <img src="Images/newfolder.gif" />
                </td>
                <td>
                    Make a new folder
                </td>
            </tr>
            <tr>
                <td>
                    <img src="Images/publishthisfolder.gif" />
                </td>
                <td>
                    Publish this folder to the Web
                </td>
            </tr>
            <tr>
                <td>
                    <img src="Images/sharethisfolder.gif" />
                </td>
                <td>
                    Share this folder
                </td>
            </tr>
        </table>
   </ContentTemplate>
</ISWebDesktop:WebExplorerBar>
- Now, you have learned how to create an explorer bar with UseInlineContent as the ContentMode.
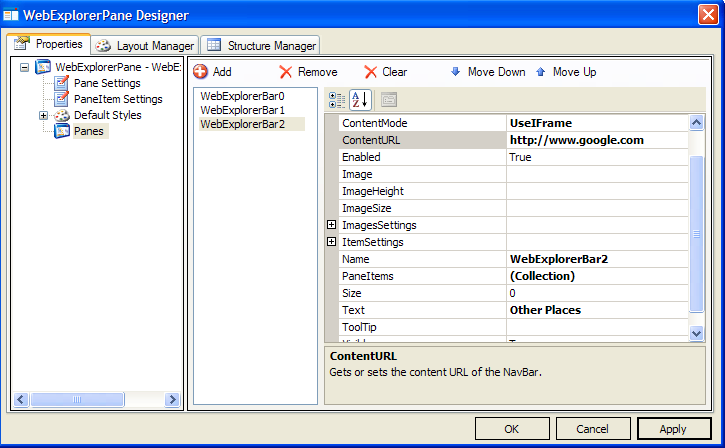
- Again, go back to WebExplorerPane Designer. Add a new WebExplorerBar and set ContentMode to UseIFrame and
ContentURL to http://www.google.com like the following snapshot.
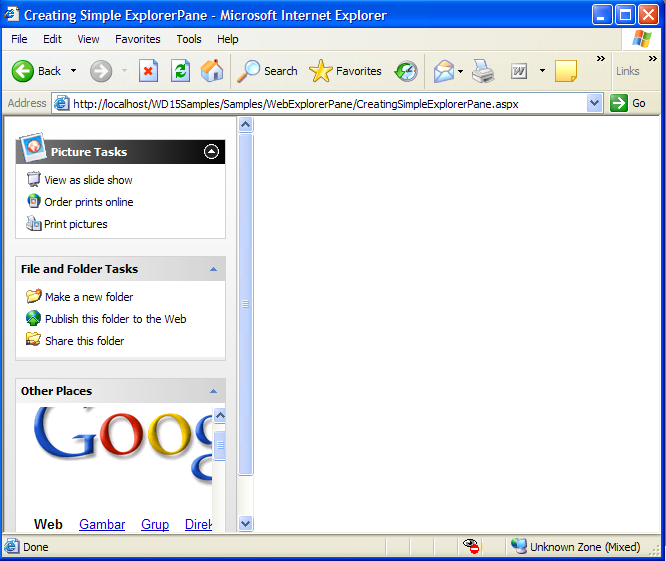
- Run the project and you will see something like following.