This walkthrough shows you how to configure updatable hierarchical WebGrid in Batch Update mode by using ISDataSource.
During this walkthrough, you will learn how to do the following:
- Use ISDataSource
- Use SmartTag to set DataSource
- Use DataSourceConfiguration Wizard to set the database and table
 Prerequisites
In order to complete this walkthrough, you will need the following:
- Access to the Microsoft Access Northwind database.
- Visual Studio 2008 Application.
 Step-By-Step Instructions
To create updatable WebGrid in batch update mode
- Binding WebGrid to Hierarchical ISDataSource control.
- Click the SmartTag on the upper right of the WebGrid.
- In Behaviors field, check following list of checkboxes: Allow Add New; Allow Editing; Allow Delete; Allow Sorting [optional]; Allow Grouping [optional]; Allow Exporting [optional]; Allow Filtering [optional]; Allow Column Freezing [optional]; Allow Column Moving [optional]; Allow Column Sizing [optional]; Allow Column Selection [optional]; Allow Context Menu.
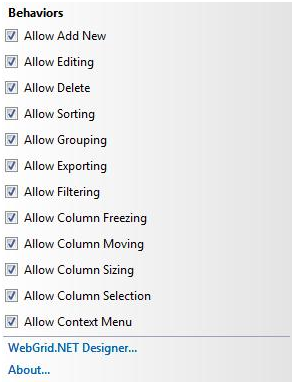
- Click WebGrid.NET Designer from the SmartTag menu of the WebGrid. Intersoft Component Designer 2.0 �?? WebGrid Enterprise® 7.0 will appear.
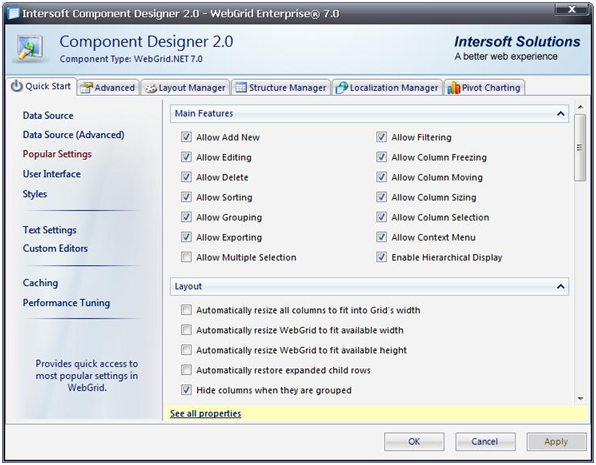
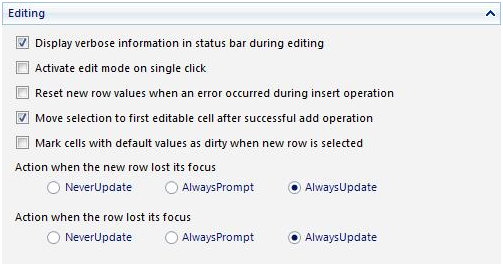
- On the Quick Start tab, click Popular Settings from left pane, and scroll down until the Editing section. Check Display verbose information in status bar during editing and Move selection to first editable cell after successful add operation; select AlwaysUpdate radio button on Action when the new row lost its focus and select AlwaysUpdate radio button on Action when the row lost its focus.
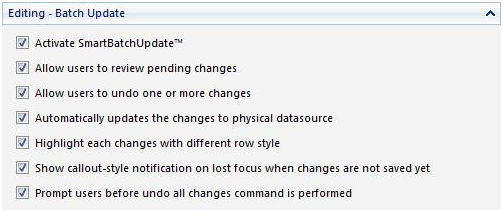
- Scroll down until the Editing �?? Batch Update section. Check the entire checkboxes option within this section.
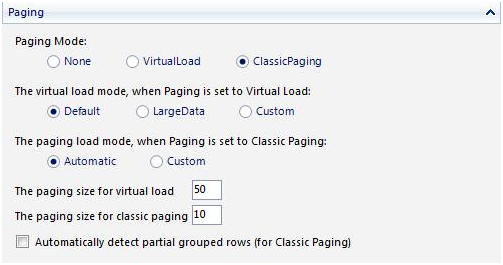
- Scroll down until the Paging section. Set Paging Mode to ClassicPaging and Paging size for classic paging to 10.
- In the Properties, set the width of the WebGrid to 100% and height to 393px.
- Run the project and the WebGrid should look like following.


