This walkthrough shows you how to configure updatable WebGrid in Batch Update mode using AccessDataSource control.
During this walkthrough, you will learn how to do the following:
- Use AccessDataSource.
- Use SmartTag to set DataSource.
- Use Data Source Configuration Wizard to set the Database, table and also INSERT,UPDATE and DELETE statements.
- Apply Batch Update Mode
 Prerequisites
In order to complete this walkthrough, you will need the following:
- Access to the Microsoft Access Northwind database.
- Visual Studio 2008 Application.
Step-By-Step Instructions
To create new web application and bind WebGrid to AccessDataSource
- Launch Visual Studio.NET 2008.
- Click on File menu, then select New and click Web Site.
- Select ASP.NET Web Site in the Template box and set Location to HTTP.
- Named the Web Site and click OK.
- Right-click on Project's name and select Add New Item.
- Select Intersoft AppForm in the My Templates box and named it as Walkthrough.aspx.
- Drag WebGrid instance from ToolBar to WebForm.
- In the Solution Explorer, right-click on App_Data and select Add Existing Item.
- Browse and add NorthWind.mdb in C:\Program Files\Intersoft Solutions\Data (Default installation folder).
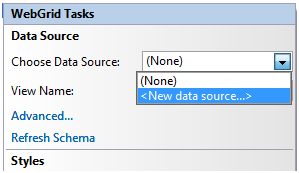
- Click the SmartTag on the upper right of the WebGrid.
- In Choose Data Source field, choose <New data source...>.
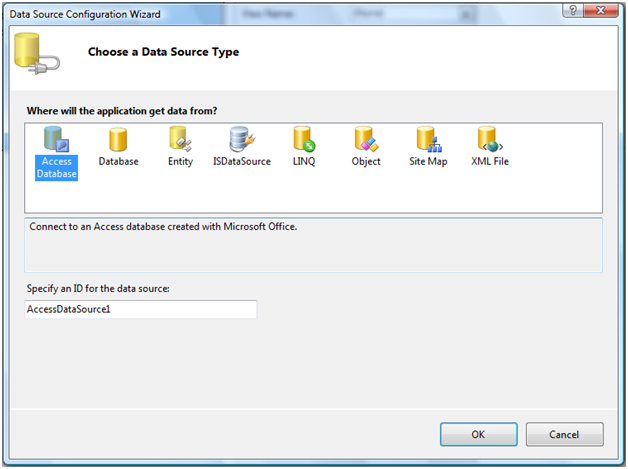
- In Data Source Configuration Wizard, choose AccessDatabase and click OK.
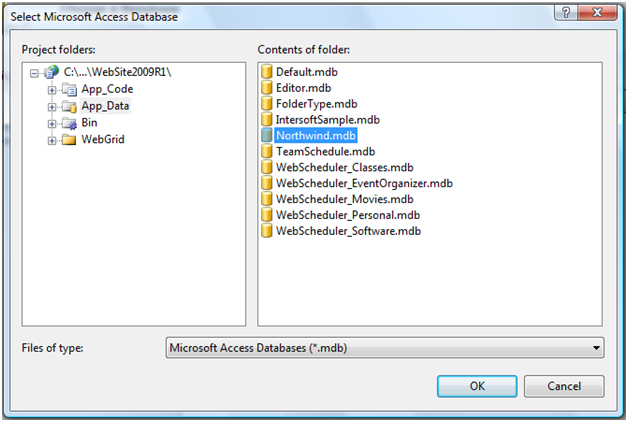
- Browse and select the database in App_Data (NorthWind.mdb) and click OK.
- Select the table that you want to use and click Next.
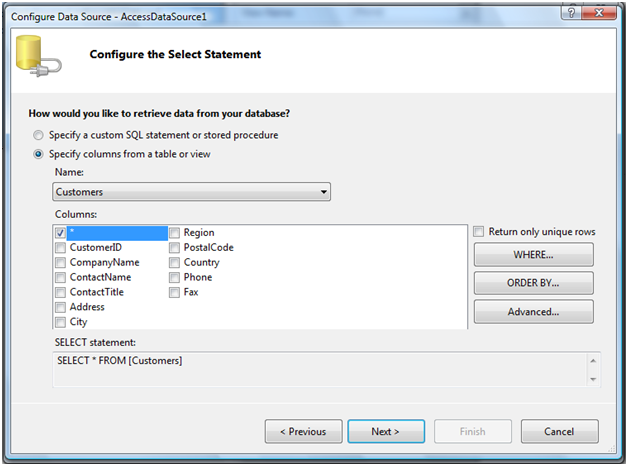
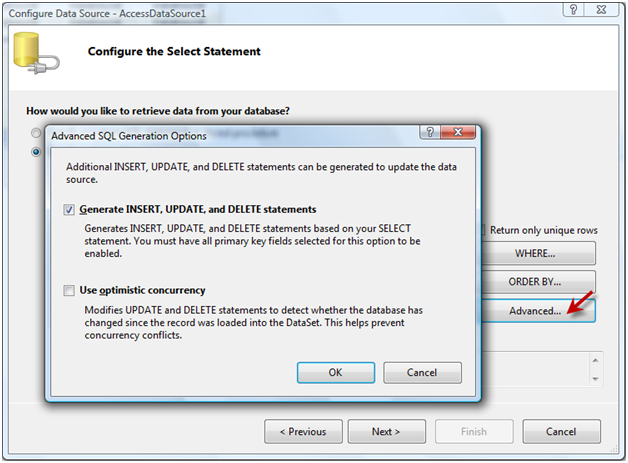
- Configure INSERT,UPDATE, and DELETE statements by clicking Advanced Button (Please check how to configure the INSERT,UPDATE and DELETE statements for another DataSourceControl).
- In this step, you can view the table's database using Test Query button. Otherwise, click Finish to proceed to the next step.
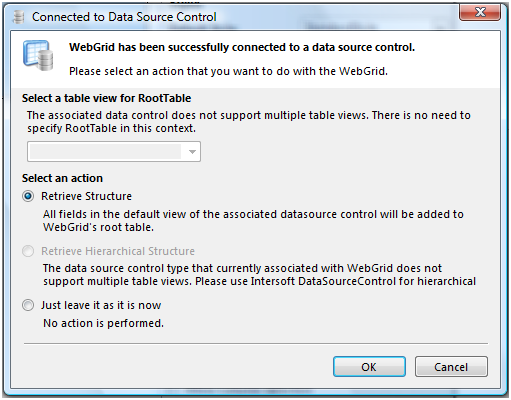
- Finally, choose Retrieve Structure action in Connected to Data Source Control Wizard and click OK to apply all settings.
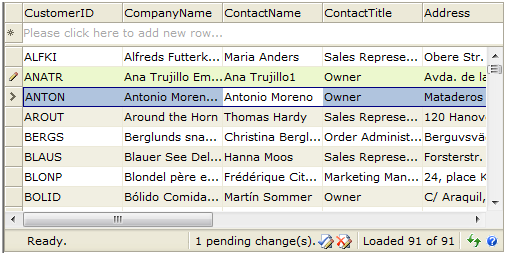
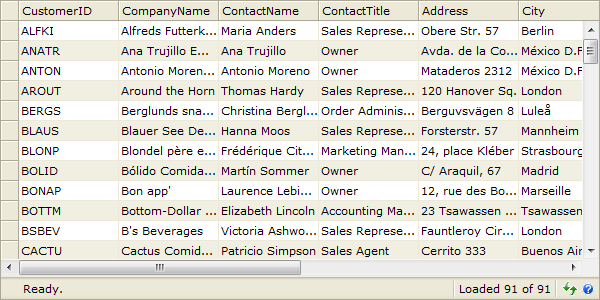
- Run the project and the WebGrid will look like following.
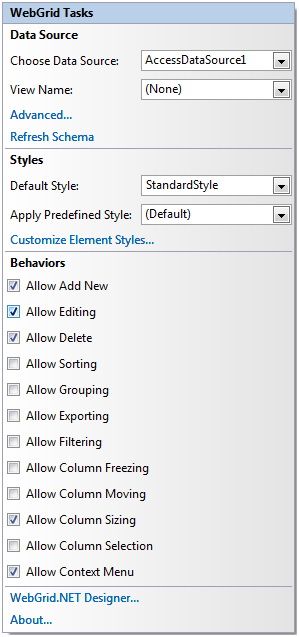
- Set the AllowEdit,AllowAddNew and AllowDelete property to Yes from WebGrid's SmartTag.
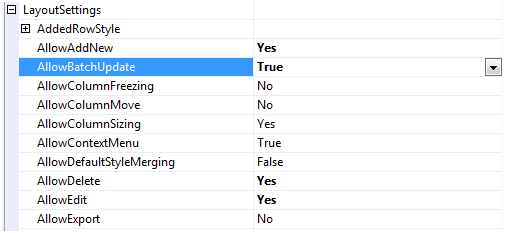
- Press F4 in WebGrid and go to LayoutSettings property. Then set AllowBatchUpdate property to true.
- When you edit or do some changes, WebGrid will look like following