


This walkthrough shows you how to configuring a WebGridColumn to use Templated Cell.
During this walkthrough, you will learn how to do the following :
- Change the WebGridColumn's ColumnType to Template using WebGrid.NET Designer.
 Prerequisites
In order to complete this walkthrough, you will need the following:
- Access to the Microsoft Access Northwind database.
- Visual Studio 2005/2008/2010 Application.
Step-By-Step Instructions
To create new web application, configure ContactName to use Label and create a new Column and configure it to use HTML Button.
- Bind WebGrid to AccessDataSource.
- Set WebGrid's properties AllowEdit to True.
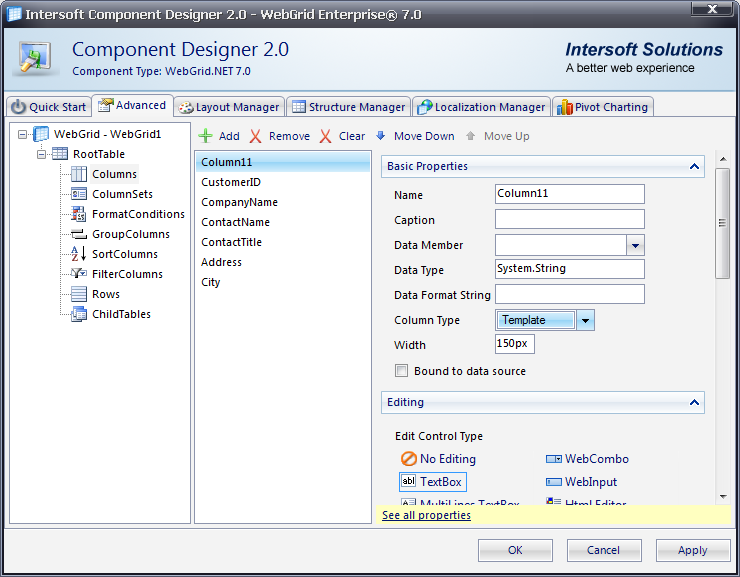
- Open WebGrid.NET Designer - Roots - Columns.
- Search for ContactName then set the ColumnType to Template.
- Click the "Add" button to add a new column and move it become first column.
- Set this new column's Name to Column11, then set ColumnType to Template.
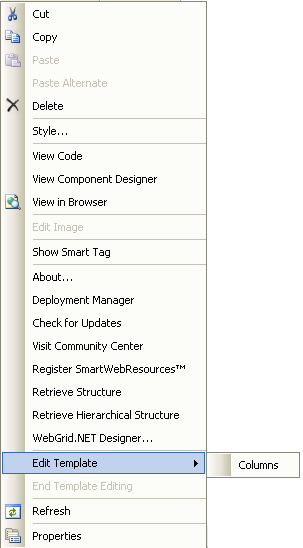
- Right click on WebGrid instance and choose Edit Template - Columns.
- Drag and drop Label to the ContactName column.
- Drag and drop HTML Button to the Column11 column.
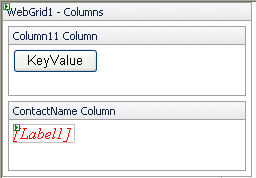
- Clear the Label's Text and set Font - Italic to True, ForeColor to Red.
- Go to HTML and set the Label's text to "<%# Bind("ContactName") %>".
eg. <asp:Label ID="Label1" runat="server" Text='<%# Bind("ContactName") %>' ForeColor="Red" Font- Italic="true" />
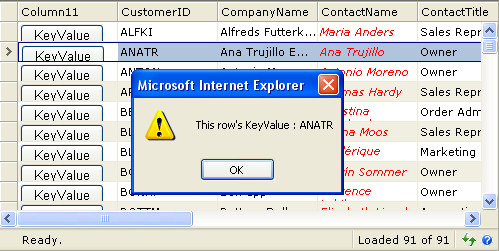
- Add Client Side event (to retrieve row's KeyValue) to this button.
JavaScript  Copy Code
function Button1_onclick()
{
   var grid = ISGetObject("WebGrid1");
   var selObj = grid.GetSelectedObject();
   var rowObj = selObj.ToRowObject();
   alert("This row's KeyValue : " + rowObj.KeyValue);
}
- Here is the result.
 See Also
Concepts
Templated Cell
Other Resources
Column Types
Walkthrough Topics
How-to Topics
References
ColumnType Property