


This walkthrough shows you how to configure updateable WebGrid to ObjectDataSource control.
During this walkthrough, you will learn how to do the following:
- Use ObjectDataSource.
- Use SmartTag to set DataSource and AllowEdit.
- Use Data Source Configuration Wizard to set the Database and table.
 Prerequisites
In order to complete this walkthrough, you will need the following:
- Access to the Microsoft Access Northwind database.
- Visual Studio 2005 Application.
Step-By-Step Instructions
To create new web application, bind WebGrid to ObjectDataSource and AllowEdit
- Launch Visual Studio.NET 2005.
- Click on File menu, then select New and click Web Site.
- Select ASP.NET Web Site in the Template box and set Location to HTTP.
- Named the Web Site and click OK.
- Right-click on Project's name and select Add New Item.
- Select Intersoft AppForm in the My Templates box and named it as Walkthrough.aspx.
- Drag WebGrid instance from ToolBar to WebForm.
- In the Solution Explorer, right-click on App_Data and select Add Existing Item.
- Browse and add NorthWind.mdb in C:\Program Files\Intersoft Solutions\Data (Default installation folder).
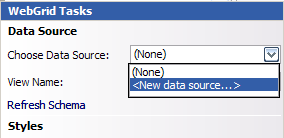
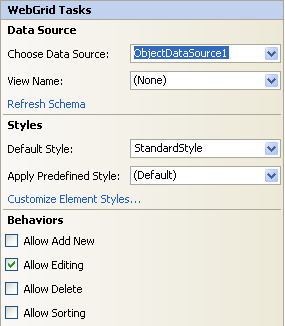
- Click the SmartTag on the upper right of the WebGrid.
- In ChooseDataSource field, choose <New data source...>.
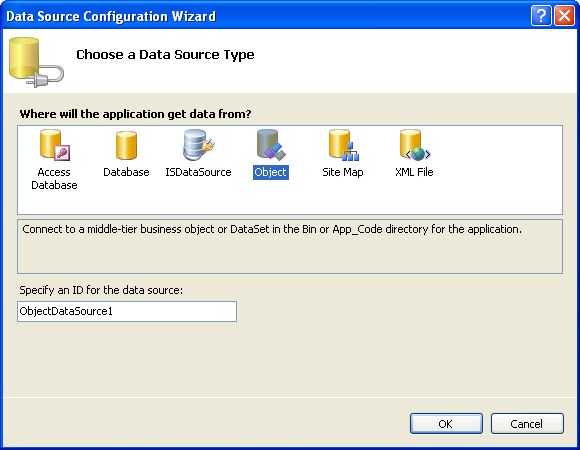
- In Data Source Configuration Wizard, choose Object and click OK.
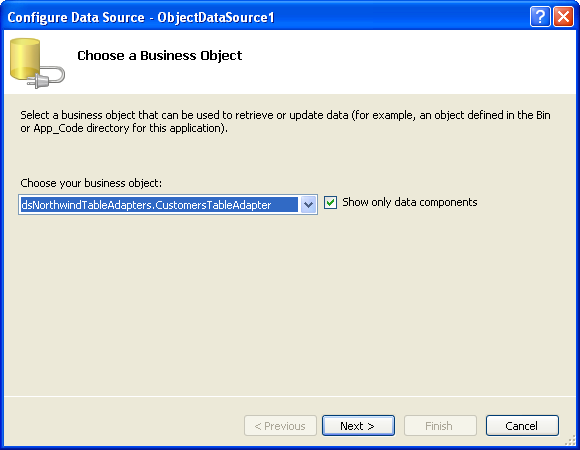
- Select your Business Object and click Next.
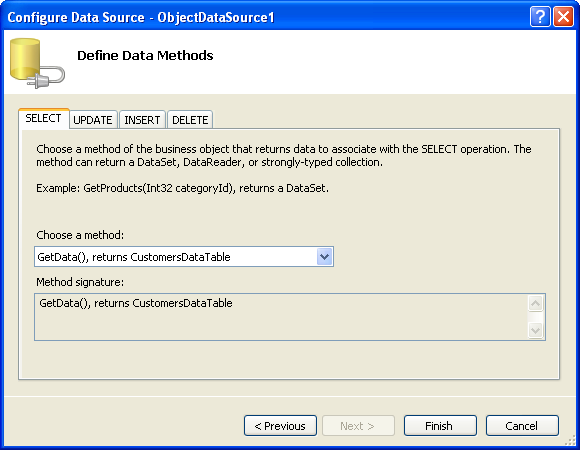
- Click Finish afterwards.
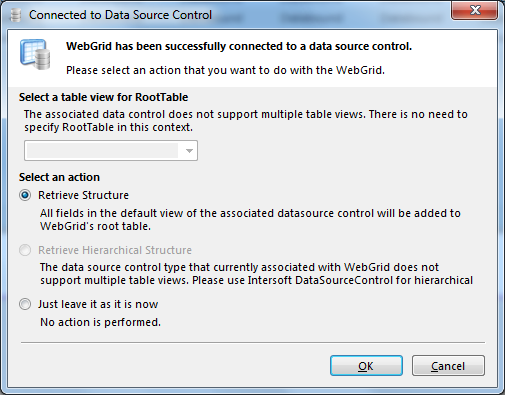
- Finally, choose Retrieve Structure action in Connected to Data Source Control Wizard and click OK.
- Select Allow Editing property from WebGrid's SmartTag.
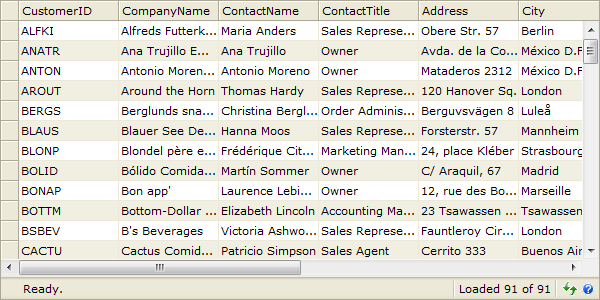
- Run the project and the WebGrid will look like following.
 See Also
Tasks
Walkthrough: Binding WebGrid to AccessDataSource control
Walkthrough: Binding WebGrid to ObjectDataSource control}
Walkthrough: Binding WebGrid to XMLDataSource control
FAQ: Can I perform retrieve structure programmatically when bound to DataSource control?
Other Resources
Walkthrough Topics
How-to Topics