


This walkthrough shows you how to change the default Localization Text in Localization Manager.
During this walkthrough, you will learn how to do the following:
- Bind WebGrid to datasource
- Change the default Localization Text in Localization Manager
 Prerequisites
In order to complete this walkthrough, you will need the following:
- Access to the Microsoft Access Northwind database.
- Visual Studio 2005 Application.
Step-By-Step Instructions
To change the default localization text in Localization Manager
- Right click on WebGrid and click on WebGrid.Net Designer.
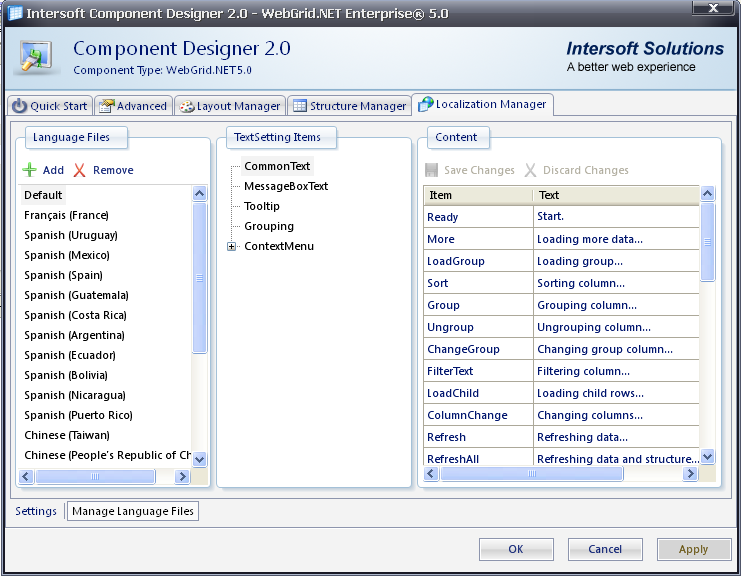
- Go to Localization Manager tab.
- Set the Language Mode to Default (en-US).
- Click Manage Language Files.
- Set Focus to CommonText in TextSetting Items.
- Change "Ready." to "Start." then Enter.
- Click OK to apply the changes.
- The picture will be like this.
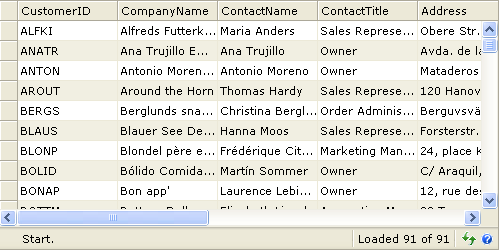
- Finally, compile and run the project. The WebGrid will look like the following snapshot (see the footer word, already changed to "Start...").
 See Also
Tasks
Walkthrough: Using French culture in WebGrid
Walkthrough: Specifying custom language used in WebGrid
How-to: Specify the Localization folder in web.config
How-to: Specify a TextItem programmatically
Concepts
Localization Manager
References
TextSettings Class
LocalizationFolder Property
Language Property
Other Resources
Walkthrough Topics
How-to Topics