Objectives
The tutorial demonstrates the LoaderTemplate and built-in capabilities to display the loader progress during the busy status. The loader UI is controlled automatically and does not require to write any single codes.
- Drag WebFlyPostBackManager from Toolbox into a WebForm page.
- Create a HTML button and named it "Show Loading Progress".
- Add the following code in the code-behind:
C#  Copy Code
using System;
using System.Data;
using System.Configuration;
using System.Collections;
using System.Web;
using System.Web.Security;
using System.Web.UI;
using System.Web.UI.WebControls;
using System.Web.UI.WebControls.WebParts;
using System.Web.UI.HtmlControls;
using ISNet.WebUI.WebDesktop;
public partial class ShowingLoadingProgress : System.Web.UI.Page
{
WebFlyPostBackListener listener = null;protected void Page_Load(object sender, EventArgs e)
{
listener = new WebFlyPostBackListener(this);
}[WebFlyPostBackMethod()]
public string LoadingProgress()
{
for (int i = 0; i < 10000; i++)
{
for (int j = 0; j < 10000; j++)
{
}
}
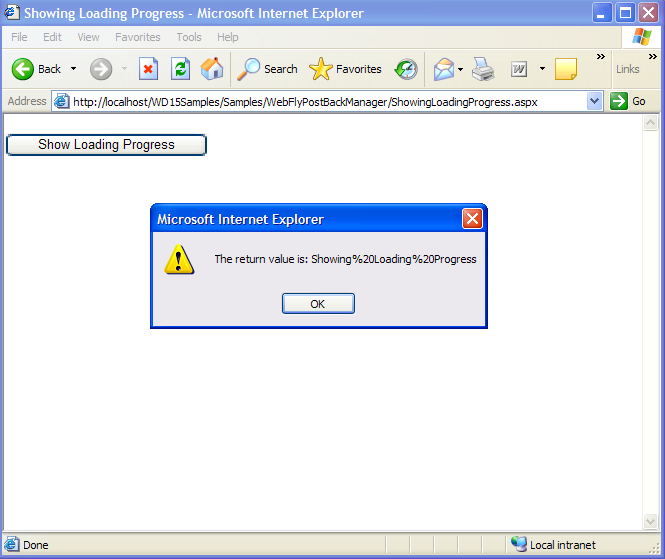
return "Showing Loading Progress";
}
}
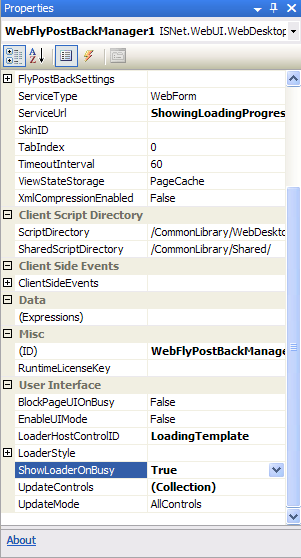
- In the properties box of WebFlyPostBackManager, set the following:
Properties Values ServiceType WebForm ServiceUrl The URL path of the page (in this case, the path is ShowingLoadingProgress.aspx) ShowLoaderOnBusy True LoaderHostControlID LoadingTemplate
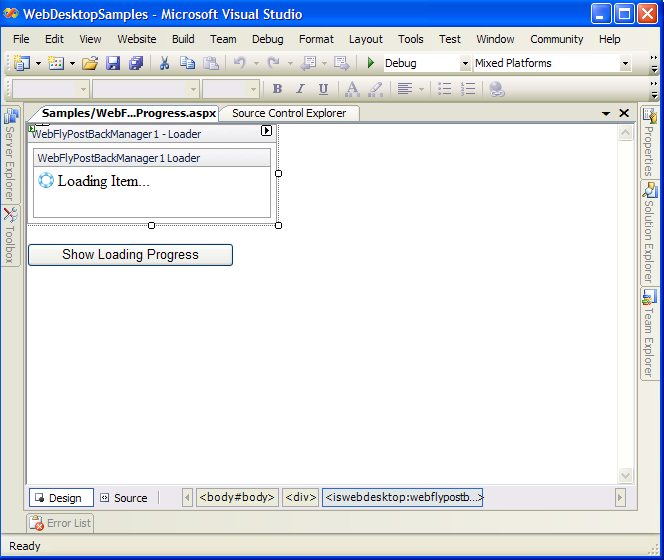
- Right-click on the WebFlyPostBackManager and choose Edit Template --> Loader.
- The Loader template will be displayed. Put a HTML image in the template and set the Image Src to /CommonLibrary/Images/WebDesktop/is_progress-16.gif and type "Loading Item" next to the image.
- Right-click on the template and choose End Template Editing.
- In the HTML code, put the following line under the HTML button tag:
<input id="Button1" type="button" value="Show Loading Progress"/>
<br />
<div id="LoadingTemplate"></div>

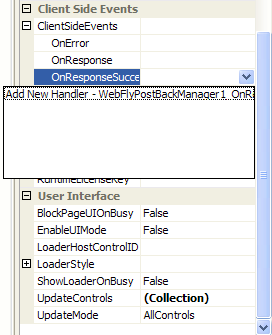
The div id of "LoadingTemplate" is used to be defined in LoaderHostControlID. Therefore, the loading template will be displayed in this div according to the Id specified in LoaderHostControlID. - Add the "OnResponseSuccess" Client Side Events of WebFlyPostBackManager.
- Add the following code in the client-side:
Script Copy Code<script language="javascript">
function DoClick()
{
var FPBMan = ISGetObject("WebFlyPostBackManager1");
// call the HelloWorld method of the specified ServiceUrl
FPBMan.LoadingProgress();
}
function WebFlyPostBackManager1_OnResponseSuccess(controlId, methodName, returnValue)
{
alert("The return value of HelloWorld method is: " + returnValue);
}
</script>
- Invoke DoClick() function in onclick event like the following:
Script Copy Code<input id="Button1" type="button" value="Show Loading Progress" onclick="DoClick()"/>
- When you click the button, it will show the loading progress defined in the loader template.
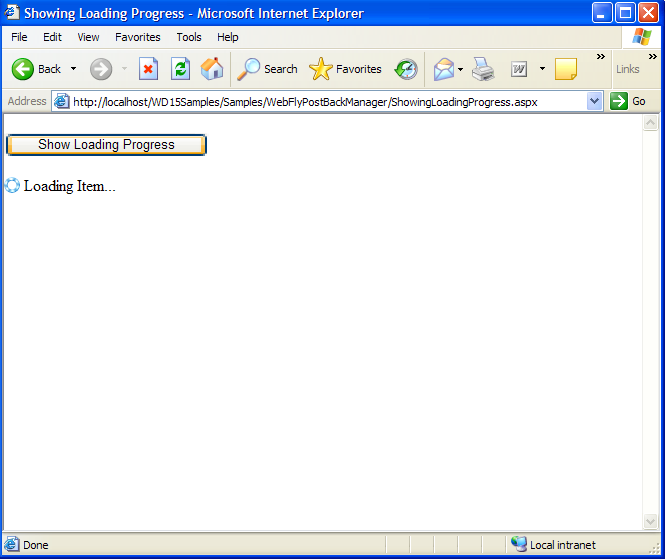
- Afterwards, it will display the return value defined in the WebForm.