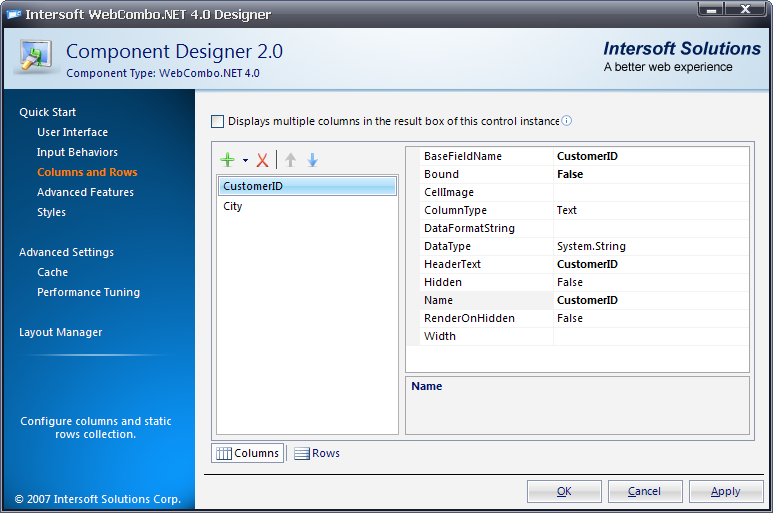
WebCombo.NET V4.0 has the ability to implement the control by using improved server-side object models. You can easily add multiple columns and row items in a single interface WebCombo.NET Designer(Centralized). The columns and rows can also be added dynamically at runtime.
This topic will show you how to add columns to WebCombo using WebCombo designer.
To add columns to the WebCombo
- Right click on the WebCombo instance and select WebCombo.NET Designer.
- Go to Columns and Rows then press the green "+" button to add new column (you can add more than one column).
- Set the Bound property to True if you want the column type in Bound mode, and False if you want to set it to unbound mode.
- Check the Displays multiple columns in the result box of this control instance if you want to set the combo's resultbox in multiple columns.
- Run the project.
Here is the snapshot to create columns in WebCombo.NET Designer:


