This walkthrough shows you how to enable WebTreeView to accept data items from
WebGrid control.
During this walkthrough, you will learn how to do the following:
- Use AccessDataSource.
- Bind WebTreeView.
- Use DragDropExtender to set the Drag control and Drop control.
- Set the TreeView to accept data from other control
In order to complete this walkthrough, you will need the following:
- Access to the Microsoft Access Northwind database.
- Visual Studio 2005/2008/2010 Application.
To enable WebTreeView to accept data items from WebGrid control
- Launch Visual Studio.NET 2008.
- Click on File menu, then select New and click
Web Site.
- Select ASP.NET Web Site in the Template box and set Location
to HTTP.
- Named the Web Site and click OK.
- Right-click on Project's name and select Add New Item.
- Select Intersoft AppForm in the My Templates box and named it as
Walkthrough.aspx.
- Drag WebGrid instance from ToolBar to WebForm.
- Bind WebGrid to AccessDataSource control.
- Drag WebTreeView instance from ToolBar to WebForm.
- Bind WebTreeView to XmlDataSource.
- Click the WebTreeView instance and press F4 to open its Properties
window.
- Set AllowDragDrop to True and AllowDropFromOtherControls
to True.
- Expand DragDropSettings and set the following properties.
|
AllowChildDrop
|
True
|
|
AllowLeafDrop
|
True
|
|
AllowRootDrop
|
True
|
|
AllowSiblingDrop
|
True
|
- Drag WebDragDropExtender from ToolBar to WebForm.
- Right click on WebDragDropExtender control and choose Properties.
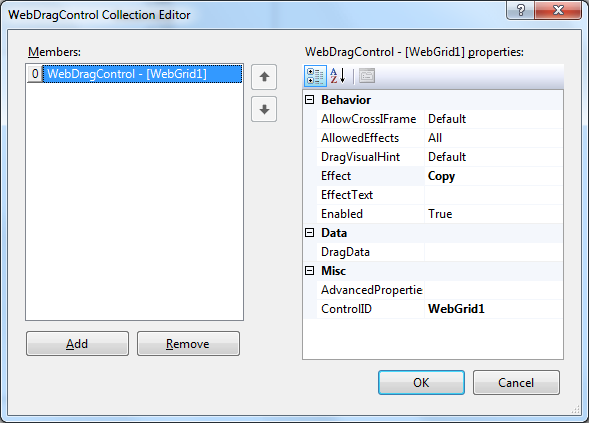
- On DragControls property, click the (collection)
button to open WebDragControl Collection Editor.

- Set ControlID to WebGrid1 and Effect
to Copy.
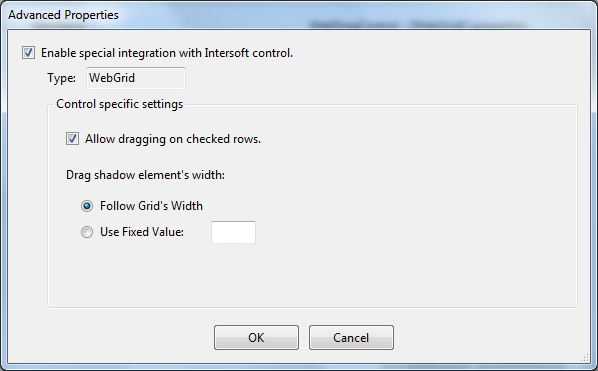
- Click the (collection) button on AdvancedProperties
and a dialog box will appear afterwards.
- Select Enable special integration with Intersoft control and
Allow dragging on checked rows. Click OK to apply the
settings.

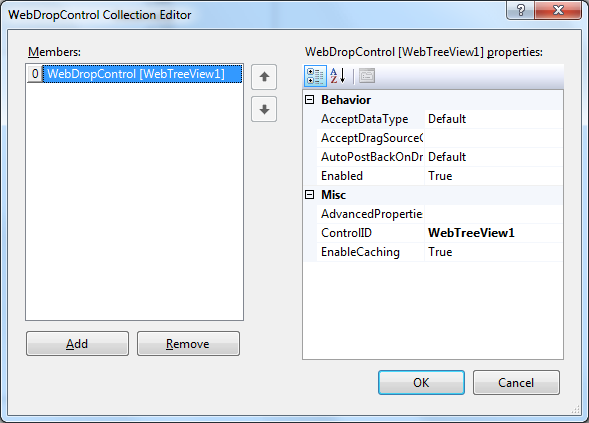
- On DropControls property, click the (collection)
button to open WebDropControl Collection Editor. Set ControlID
to WebTreeView1.

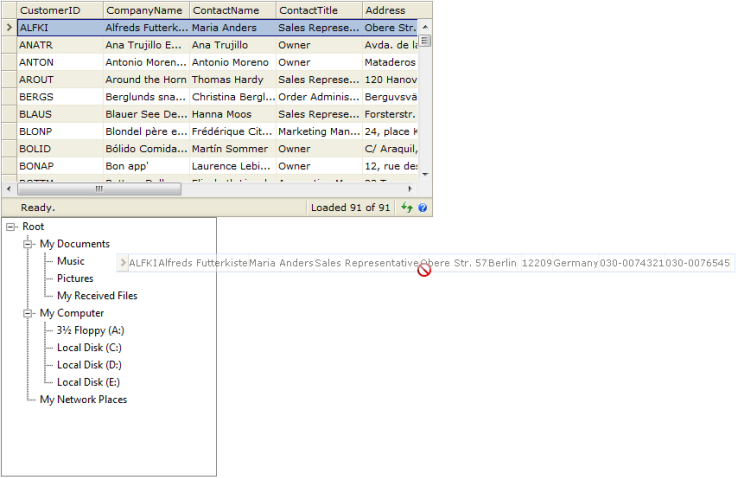
- Run the project.
