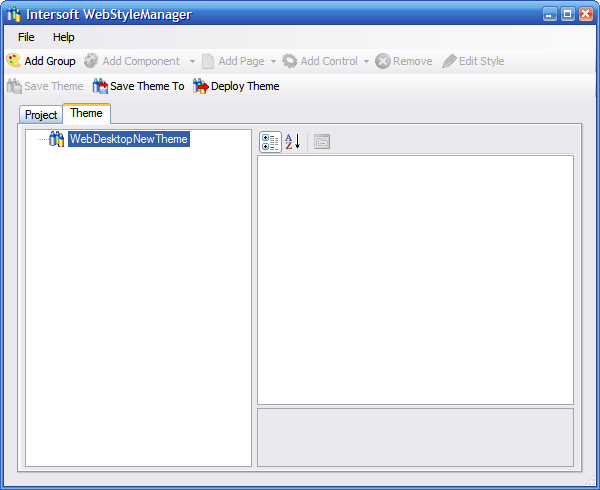
This topic provides a step-by-step instruction on how to use WebStyleManager
with Intersoft controls.
To create and configure a new ISTheme project for a Web application.
- Open WebStyleManager and click New Project from the File menu.

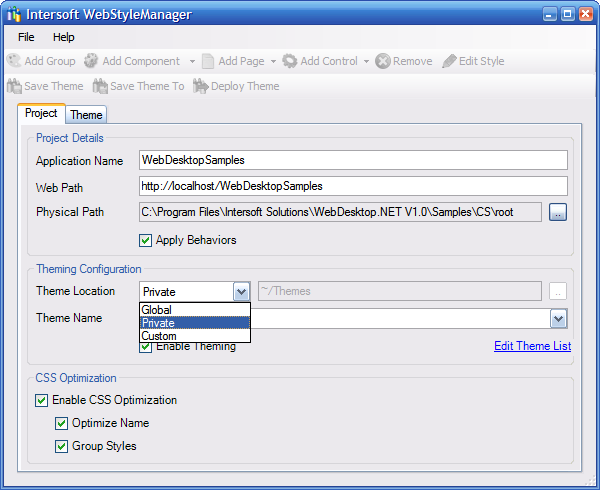
- In this tutorial, the WebDesktopSamples will be used as a sample project. Next,
fill in the fields of the WebStyleManager as shown below.
First, we put in the name of the Web application. Then, we specify the Web Path
of the Web application. If you put in the correct Web path, the Physical Path will
automatically be filled.
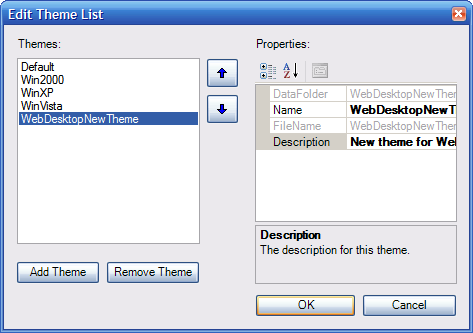
- Click the Edit Theme List link to edit the theme list and the Theme
List Editor will be shown.
Click the Add Theme button and enter WebDesktopNewTheme for the
new theme. After you finish adding the new theme, click OK
to save the list.
- Now, the name of the new theme we defined in the Theme List Editor should be available
in the Theme Name DropDownList. Select WebDeskotpNewTheme from the Theme
Name.
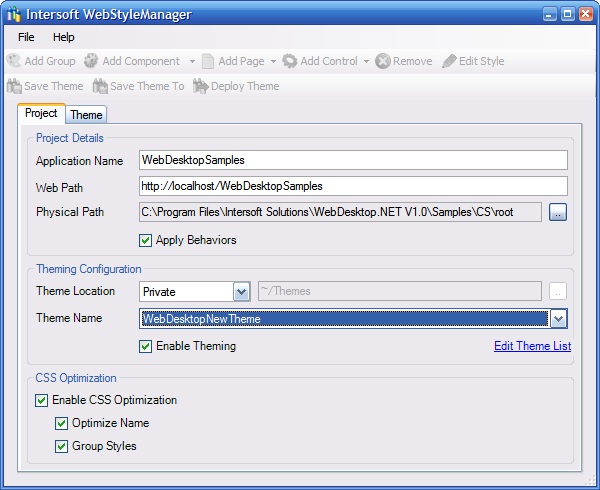
- Select Enable Theming checkbox to use theme for this Web application.
- Select all Checkboxes that are available in the CSS Optimization group.
To create a new theme definition for Web application.
- Select the WebDesktopNewTheme node and click the Add Group button to add a new group.
A theme definition may contain one or more group for better organization purpose.
- Create a new group as the Default group and select WebDialogBox from the Add Component
DropDownButton.
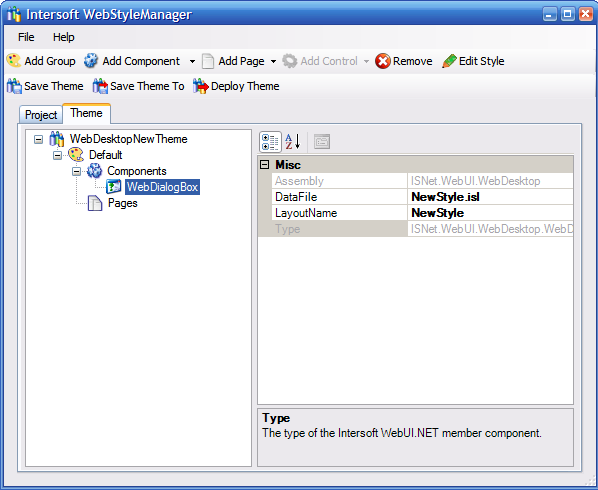
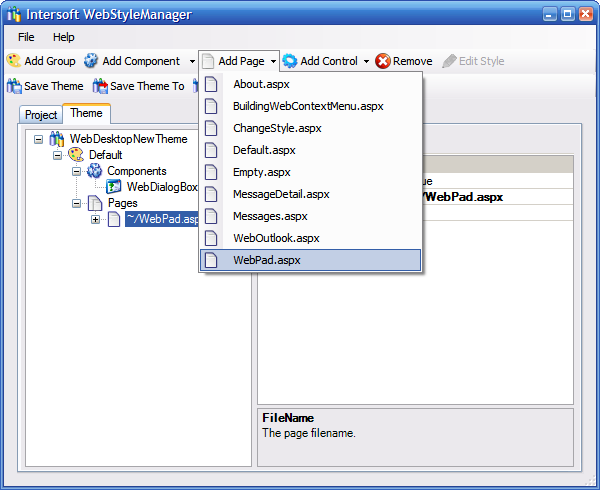
- Add the page 'WebPad.aspx' from the 'Add Control' DropDownbutton. As explained
in Using Theme Editor topics, you add a page to override the styles that are defined
in Components node for this specific page. You can set the Enable Theming property
of the page to false to enable/disable theming for the page.
To create a new style for a component or control.
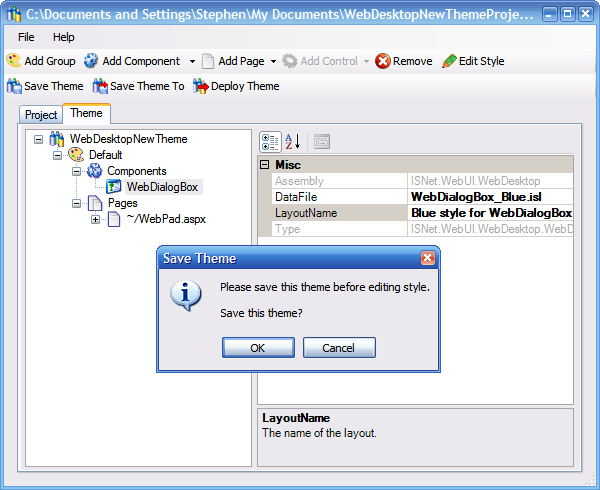
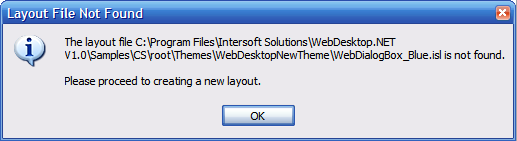
- Enter 'WebDialogbox_Blue.isl' as the layout file name in the DataFile
property and click the Edit Style button to proceed to creating a new style. The
WebStyleManager confirms if the theme file (WebDesktopNewTheme.theme) should be
saved before proceeding. Click OK to proceed.
- The dialog box below informs that you do not have this file and you are going to
create a new file with this file name.
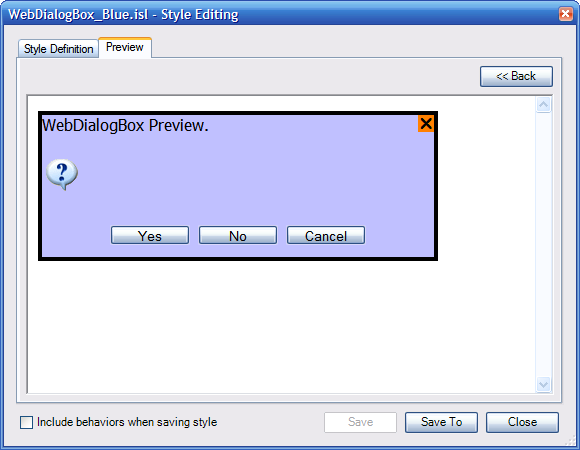
- Click OK and the Style Editor dialog will be shown. Select the WindowStyle node
which is the child of the Styles node in the Style treeview and change the Normal
BackColor to #C0C0FF.
- You may also change other styles as needed. Remember to click the Save button
before previewing the style, otherwise the changes will not be shown in the Preview
tab. Then, click the Preview Tab to preview the new style.
- Click Save to save the new style and check the 'Include behaviors when saving style'
CheckBox if you want to include behaviors settings in the layout file as well. You
can modify the behaviors by selecting the WebDialogBox node in the treeview and
modify its properties through the PropertyGrid.
- Click Close to go back to WebStyleManager's Theme tab.
To configure styles of a Web application using WebStyleManager.
Configuring styles for Web application is actually defining styles for components
that are used in your Web application. For instance, in the previous tutorial "Creating
New Style" you already created a new style for the WebDialogBox component,
that means you already configured all the controls of WebDialogBox type in your
Web application to use that new WebDialogBox style. You can, however, override that
style by creating a new style for a specific page or control. The same rule applies
to all other components.
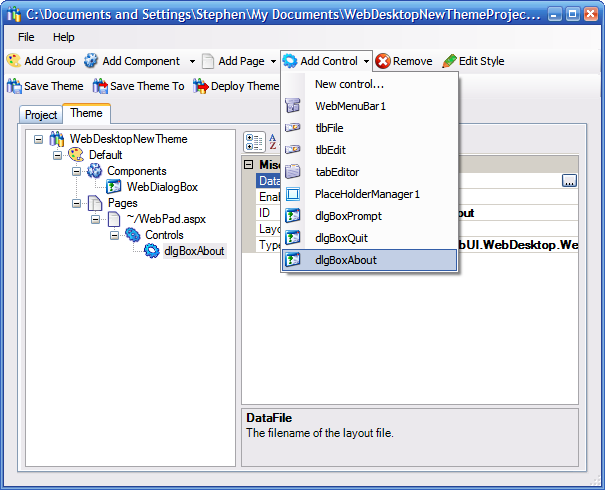
To configure the style of a specific page or control.
- Click on the ~/WebPad.aspx page node and select the dlgBoxAbout control from the
Add Control DropDownButton.
- Enter the DataFile file name for the new layout. The DataFile here is the file
name of the layout file (*.isl) of the control. You can select an existing
layout file or just enter a new file name. If use an existing layout file, the file
will be copied to the WebDesktopNewTheme directory. On the other hand, if you enter
a new file name a layout file will be created, also in the WebDesktopTheme directory.

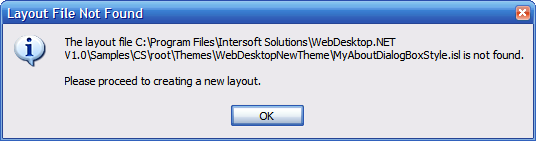
- In this case, enter a new layout filename 'MyAboutDialogBoxStyle.isl' and click
Save. Then click the Edit Style button to start editing the style. A dialog box
will show up and informs that the layout file is not found and therefore we are
going to create a new layout. Click OK to proceed.
- The style editor window is displayed and we can start editing the new style. Modify
some styles and then click the Save button so the changes can be reflected on the
preview.
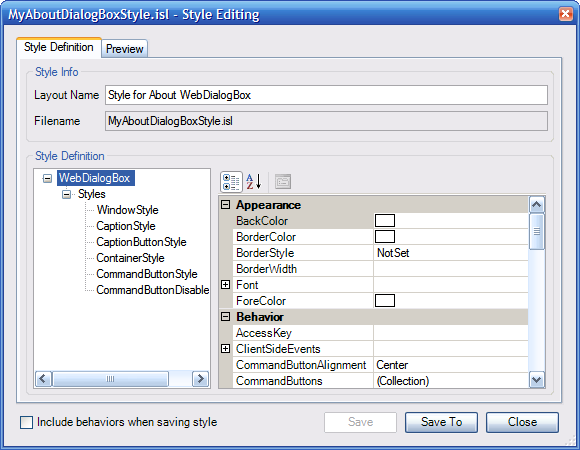
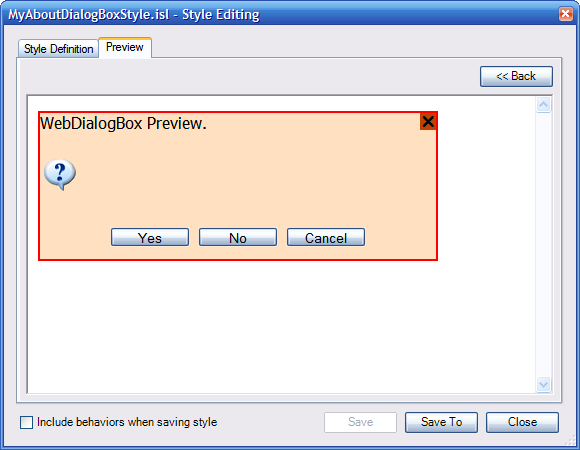
- Click the Preview tab to preview the changes.
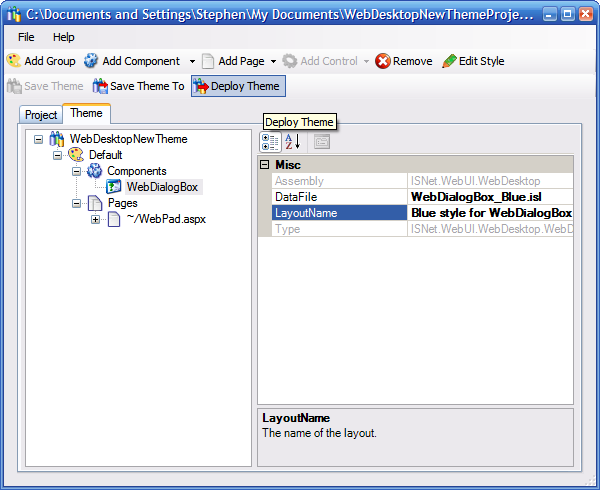
To deploy the newly created ISTheme project file to the Web application.
- After we finish with defining a new theme and creating a new style/layout file.
We are ready to deploy the theme project file.
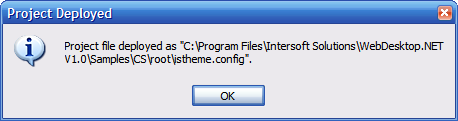
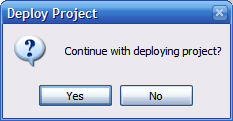
- Confirm the deployment by clicking OK.
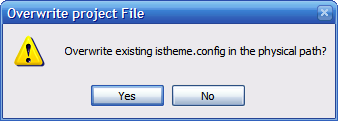
- Confirm overwriting by clicking OK. If the Web application has already had
an istheme.config file inside, you need to overwrite the file since one Web
application can contain only one istheme.config file (Theme project file).
- A dialog box informs that the project file has been deployed successfully.