This topic provides a step-by-step instruction on how to deploy Silverlight application
with SmartWebResources.
To deploy Silverlight project with Runtime License Manager
- Create a silverlight application using Visual Studio. For instance: SilverlightApplication1.
- Build and run the project to ensure everything works fine.
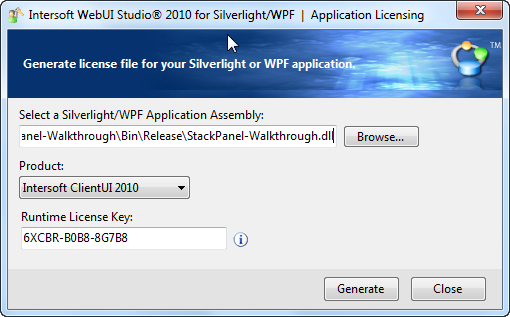
- Launch Runtime Application Licensing for Silverlight from Start Menu\Programs\Intersoft
WebUI Studio 2010 R1\WebUI Studio for Silverlight 4.
- Browse to your main Silverlight application assembly and enter your Runtime
License Key.

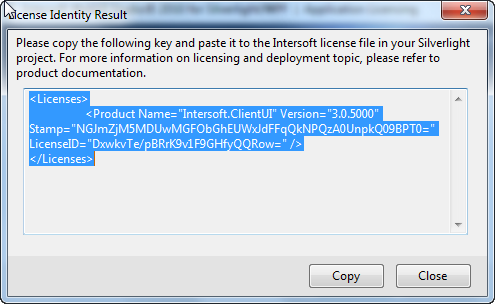
- Click the Generate button and if the key is valid, the following
message will appear.

- Copy the text that appears in the window.
- Create a new XML file in Visual Studio 2010 and name it licenses.islicx.
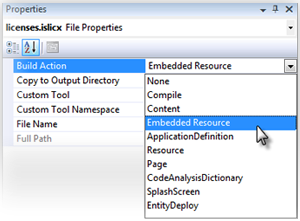
Select the licenses.islicx file and switch to the property window.
Set the Build Action property to Embedded Resource.

|
The licenses.islicx file should be placed in the root folder of your project.
|

-
Paste the text from the
License Identity Result into the
license.islicx
file and save it.
<Licenses>
   <Product Name="Intersoft.ClientUI" Version="3.0.5000" Stamp="NGJmZjM5MDUwMGFObGhEUWxJdFFqQkNPQzA0UnpkQ09BPT0=" LicenseID="DxwkvTe/pBRrK9v1F9GHfyQQRow=" />
</Licenses>
-
Congratulations! Your Silverlight application is now licensed.

|
Please note that this is a one-time application-wide license, which means you will
have to license any other unlicensed Silverlight applications.
|
- Go to your project directory and find a .xap file in
ClientBin folder, e.g: [Project Folder]\SilverlightApplication1\SilverlightApplication1.Web\ClientBin\SilverlightApplication1.xap.
- Copy this .xap file (SilverlightApplication1.xap) to your
production server for deployment purpose.